
By Yvonne Deng
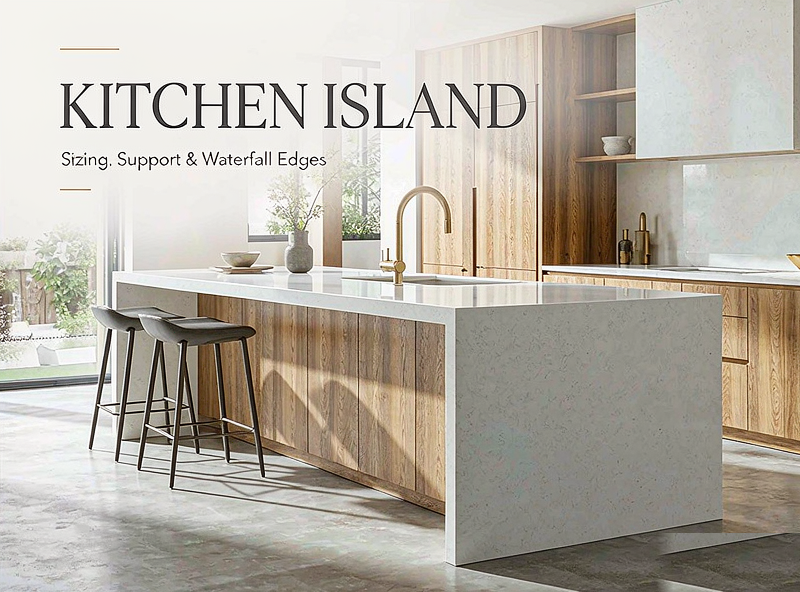
The island is the one surface where quartz is asked to work structurally — so sizing, support, and the waterfall joint are decided before the slab is cut.
A quartz kitchen island succeeds or fails on three numbers: at least 610 mm (24 inches) of width per seated person, an overhang that does not exceed one-third of the cabinet depth — about 250 to 300 mm — without mechanical support, and a walkway of 1000 to 1070 mm (39 to 42 inches) behind the seating. Everything else, including the waterfall edge, follows from those three figures plus the weight of the stone itself: a 20 mm quartz slab weighs roughly 48 kg per square metre, so a 2400 × 1000 mm island top carries about 115 kg of stone before a single cabinet is added.
Islands are where engineered quartz gets treated as a structural component rather than a decorative surface, and it is also where I see the most avoidable failures — a 400 mm seating overhang with nothing under it, a waterfall leg sitting on shims, a joint line that reads as a scar because it was polished on site. All three are specification errors made weeks before installation, which means they are free to fix now. This guide is the sequence I walk fabricators and importers through, in the order the decisions actually arrive: dimensions, then support, then the waterfall joint, then weight, then services.
TL;DR
- Seating needs 610 mm (24 inches) of width per person, a 300 mm (12 inch) overhang for stools or 380 mm (15 inches) for dining, and 1000–1070 mm (39–42 inches) of walkway behind the stools.
- Unsupported quartz overhang should stay within one-third of the cabinet depth — roughly 250 to 300 mm — and anything beyond that needs a corbel, steel flat bar, or a leg.
- A 20 mm slab weighs about 48 kg per square metre, so a typical island top carries 115 kg of stone, and a waterfall edge adds another 80 to 90 kg in two vertical panels.
- Waterfall joints read as continuous only when both faces come from adjacent sections of one slab, are bonded with colour-matched adhesive, and are polished before installation.
- Cut the seam at a sink cut-out or a mitered corner, so it lands where the eye already expects a change rather than in the middle of a visible run.
Start With the Numbers: Island Dimensions That Actually Work
Layout errors on islands are almost always clearance errors, not size errors. Because an island is walked around, sat at, and worked on from both sides, the dimensions that decide whether it feels generous or cramped are the gaps between it and everything else — not the island’s own footprint. The table below is the set of figures we send with projects, in both units because fabrication shops work in one and designers usually think in the other.
| Dimension | Metric | Imperial | What it controls |
|---|---|---|---|
| Counter height | 915 mm | 36 in | Standard working height; 900 mm suits most users |
| Bar height (seated) | 1065 mm | 42 in | Raised bar tier with taller stools |
| Walkway, island to perimeter | 1000–1070 mm | 39–42 in | Two people passing with a drawer open |
| Seating width per person | 610 mm | 24 in | Elbow room; below 600 mm it feels shared |
| Overhang for stools | 300 mm | 12 in | Knees clear the cabinet face |
| Overhang for dining chairs | 380 mm | 15 in | Chair depth plus footrest |
| Knee space height | 380 mm | 15 in | Clearance under the overhang |
| Island length-to-depth ratio | 2:1 to 3:1 | — | Proportion; beyond 3:1 it reads as a peninsula |
One practical note that never appears on a drawing: design the seating side in whole-person increments. An island sized for three stools at 610 mm needs 1830 mm of seating edge, and squeezing a fourth seat into 1900 mm produces four uncomfortable seats instead of three good ones. Because seating width is the dimension guests actually feel, buying an extra 200 mm of stone is usually the cheapest comfort improvement in the whole project.
How Much Overhang Can Quartz Take Without Support?
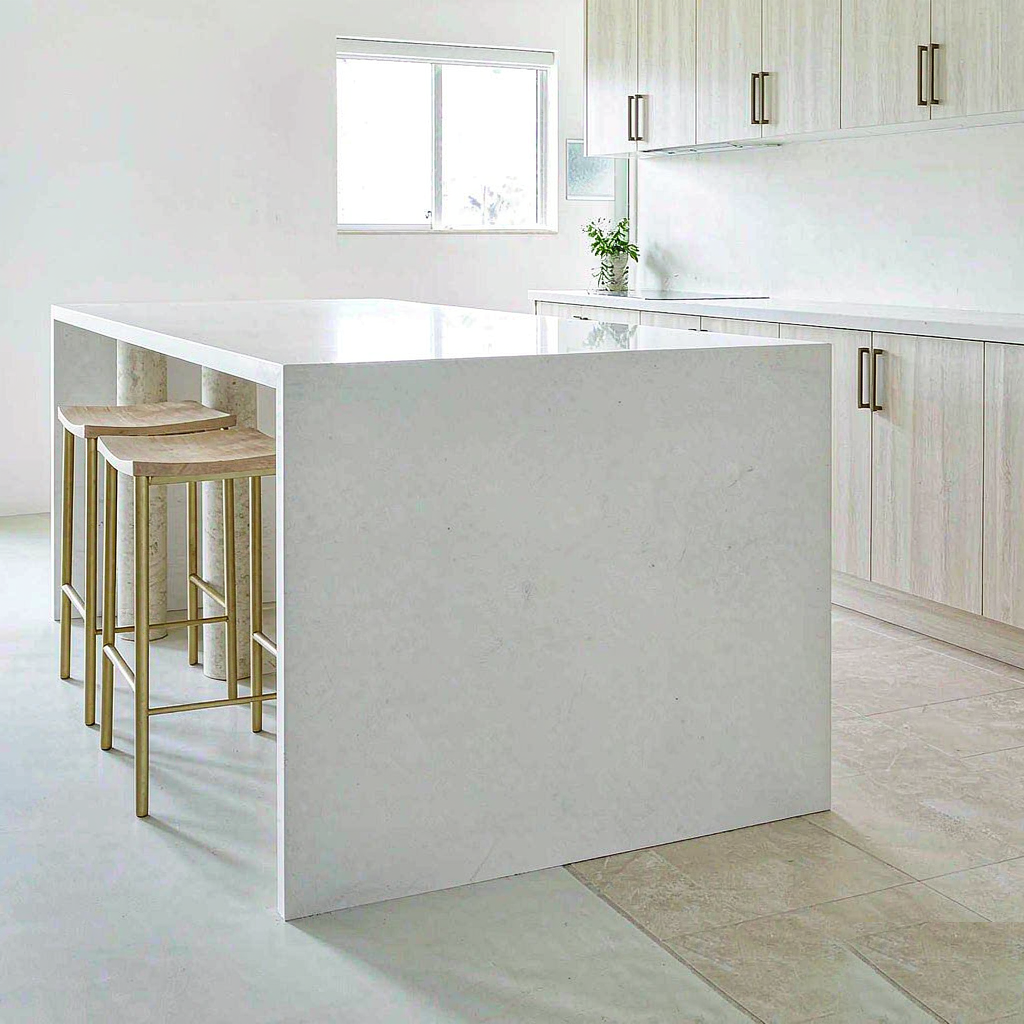
Engineered quartz is strong in compression and surprisingly weak in cantilever: unsupported overhang should stay within one-third of the cabinet depth, which works out to roughly 250 to 300 mm (10 to 12 inches) on a standard 600 mm base, and anything beyond that needs mechanical support. The physics is straightforward — a cantilevered slab bends, the bending concentrates on the top surface, and the failure always begins as a hairline crack at the corner where the overhang meets the cabinet line, then propagates across the seating edge. Because engineered stone is brittle rather than ductile, there is no warning deflection that tells you the load is too high. It holds, then it doesn’t.
Three variables move that limit in practice. Thickness helps: a 30 mm top resists deflection noticeably better than a 20 mm top and can carry a somewhat larger unsupported span, though not proportionally more. Substrate continuity matters more than thickness: a slab bedded on a full plywood or steel substrate distributes load across the whole cabinet, while a slab set on cabinet edges only carries load at the high points. Load pattern matters most: leaning on a seating edge concentrates the entire person’s weight at one point, whereas a uniformly cut-and-served buffet across the same overhang barely deflects it at all. Because the realistic load case is a person leaning, not a tray of plates, support planning should be designed around a single concentrated load at the outer edge.
Four Support Systems Compared
The right support system is a compromise between capacity, what is visible under the overhang, and what the cabinet can accept. Because every support option is a visual decision as well as a structural one, the question is not which is strongest but which one your design can hide while still carrying a leaning adult at the outer edge.
| Support system | Typical capacity | Visibility | Best used when |
|---|---|---|---|
| Wood or metal corbels | Moderate — 300–450 mm overhang | Visible but decorative | Overhang up to 450 mm where a traditional bracket suits the design |
| Steel flat bar or angle brackets | High — 450–600 mm overhang | Nearly invisible from above | Clean modern seating overhangs; bolts into cabinet framing |
| Seating legs or support posts | Very high — unlimited span | Visually dominant | Long overhangs and bar-height tiers where legs read as intentional |
| Full substrate frame or pony wall | Very high — structural | Fully concealed | Islands with sinks, cooktops, or heavy stone where a base frame is already required |
In practice most residential islands land on steel flat bar, because it disappears under the overhang and a fabricator can install it in an afternoon. My honest advice for anything past 400 mm is to have the fabricator specify the bracket rather than the designer: the bracket has to bolt into real framing, and framing layout determines what is possible. Because a support bolted into cabinet panels rather than framing carries far less than its rated capacity, the specification has to name the attachment, not just the bracket. Standard flexural strength data published per ASTM C880 describes the material, not your overhang; the engineering belongs to the assembly.
Waterfall Edges: Anatomy, Joint, and Why They Fail
A waterfall edge is two mitred panels continuing the countertop down to the floor, and the entire visual result depends on one joint. Because the vertical panel and the countertop edge meet at a 45-degree miter, the joint line falls exactly on the corner radius — which means any tone difference between the two faces, any adhesive that does not match the slab, and any polishing done out of sequence reads instantly as a seam on an otherwise continuous slab. That is why the same material can produce a flawless waterfall on one job and a visible scar on the next.
The fabrication sequence matters more than the material choice, and it runs in this order: template the finished cabinet footprint and mark the overhang in millimetres; fix the support before the stone arrives; cut the vertical panels and the top edge from adjacent sections of the same slab so the vein direction continues around the corner; miter both faces at 45 degrees and bond with a colour-matched two-part adhesive, clamped to full cure; then flush, polish, and only afterwards install. Density data used for weight planning follows the same methods as the absorption figures published per ASTM C97.
Why waterfall joints fail in the field
- Faces cut from different slab sections. The tone and vein direction stop at the corner, and no polishing hides a tone break on a white or heavily veined surface.
- Adhesive not colour-matched to the slab face. Adhesive is sampled against the face, never against a brochure or a generic chart.
- Joint polished on site after installation. Site polishing almost always pulls the finish out of plane with the factory face, and the difference shows under raking light.
- Legs bedded on shims. A waterfall panel must bear continuously on the floor or on a levelled substrate; shimmed point contact is where cracks begin.
There is also a design consequence that surprises people: a waterfall edge converts a countertop into a closed frame, so the island can no longer be adjusted for an uneven floor after setting. The floor has to be checked and levelled first, not corrected with the stone. Because the stone panel is rigid and fully bonded at both corners, any floor deviation becomes a permanent gap or a stressed joint rather than something you can shim later.
What Your Floor and Cabinets Are Actually Carrying
Stone weight is easy to underestimate because the numbers are unfamiliar, and this is where a careless specification becomes a service call. At a density of roughly 2.4 g/cm³, a 20 mm quartz slab weighs about 48 kg per square metre, so a 2400 × 1000 mm island top is roughly 115 kg of stone — and adding waterfall panels of 900 × 1000 mm on both ends adds another 80 to 90 kg. Total stone weight for that island lands near 200 kg before the cabinetry, the sink, and the person leaning on the edge.
Spread across the cabinet footprint, 200 kg is unremarkable for a residential floor. The detail that matters is where it concentrates: with a waterfall edge, the load transfers through the two vertical panels into small floor contact areas, so those points need continuous bearing on a levelled floor. Long unsupported island runs without a waterfall transfer load through the cabinet carcass instead, which is why islands over about 2400 mm benefit from a mid-span support panel or a pony wall — it stiffens the assembly and prevents the cabinet boxes from moving independently.
Plumbing, Power, and Appliances in the Island
Every appliance added to an island changes the stone and the structure, so those decisions belong in the same conversation as sizing. A sink needs at least a 760 mm (30 inch) cabinet to house the bowl and any disposal, and because the cut-out removes stone from the span, support planning shifts inward to the cabinet edges around the opening. Undermount installation is standard on engineered quartz because the material takes a clean routed edge, and a sink in the island is also the natural place to put a seam if the run exceeds one slab.
A cooktop in the island needs extraction, either a downdraft unit or a ceiling-mounted hood, and it imposes stricter heat discipline than a perimeter cooktop does — an island scorch is the most visible defect in the room, not a subtle mark on a back counter. Electrical outlets are the detail most often forgotten: island receptacles are required in most residential codes, and they are the one service that cannot be added later without cutting stone, so plan them at template stage. Because island services are cut, not drilled, at the factory stage, every outlet, hose, and vent must be on the drawing before the slab is templated — retrofitting them means replacing stone.
The Spec Sheet to Send Your Fabricator
Ten numbers prevent almost every island problem we see. Send them together, in millimeters, with the layout drawing:
- Finished cabinet footprint dimensions — not the nominal cabinet size.
- Island top length and depth, with the seating overhang in millimetres.
- Seating capacity and per-seat width, so the overhang is sized to the stools.
- Overhang support specification, including how the bracket attaches to framing.
- Waterfall edge yes or no, and which ends — plus confirmation the floor is levelled.
- Slab thickness for top and panels, including any mitred edge build-up.
- Seam locations if the run exceeds one slab, ideally at a sink cut-out or corner.
- All appliance cut-outs with templates: sink, hob, pop-up socket, downdraft vent.
- Edge profile for exposed corners — eased or bullnose, never a sharp square on an island corner.
- Batch and series reference, so the waterfall panels and the top come from the same production run.
Our standard slab format is 3200 × 1600 mm in thicknesses from 12 mm to 30 mm, which lets an island up to about 3000 mm long be cut from a single slab with no seam at all. If you are specifying a larger island, the technical team at Apex will work the seam and support layout with your fabricator rather than leaving it to the installer — that support is part of how we prefer to work with fabricators and design teams. Most island specifications land on a 20 mm top with a mitred 40 mm edge, and a white or super white field is the most common choice because it keeps a large island from dominating the room; you can see the tonal options in our super white quartz range and the wider engineered quartz stone collection.
Frequently Asked Questions
Size It Once, Support It Properly, Then Let the Stone Disappear
An island is the one place where quartz has to behave like a structure: size the seating so nobody is elbowing a neighbour, keep unsupported overhang inside one-third of the cabinet depth, and treat the waterfall joint as a fabrication sequence rather than a finish detail — do those three things and the slab stops being noticeable in the best possible way. The clients who come back happy are rarely the ones who chose the most dramatic stone; they are the ones who sent their fabricator ten numbers instead of a sketch.
Apex Quartz Stone has manufactured engineered stone since 1997 from a 40,000 m² facility in Shuitou, Nan’an, producing more than 100,000 slabs a year for buyers in over 20 countries. If you are weighing an island specification — a single-slab top, a waterfall return, or a matched set for a multi-unit project — send us the dimensions and the appliance layout, and we will come back with a slab plan, seam strategy, and weight calculation for your fabricator to build from.
Post time: Sep-24-2026