
By Yvonne Deng
International Sales Director, Apex Quartz Stone | 12+ Years in Engineered Stone Manufacturing
linkedin.com/in/yvonne-deng-5b35b543/
Installing quartz kitchen countertops requires precision, proper tools, and careful planning. While professional installation is recommended for complex projects, experienced DIYers can successfully install pre-fabricated quartz slabs by following systematic procedures. This guide provides detailed step-by-step instructions for a professional-quality installation.
Before You Begin: Important Safety and Preparation Notes
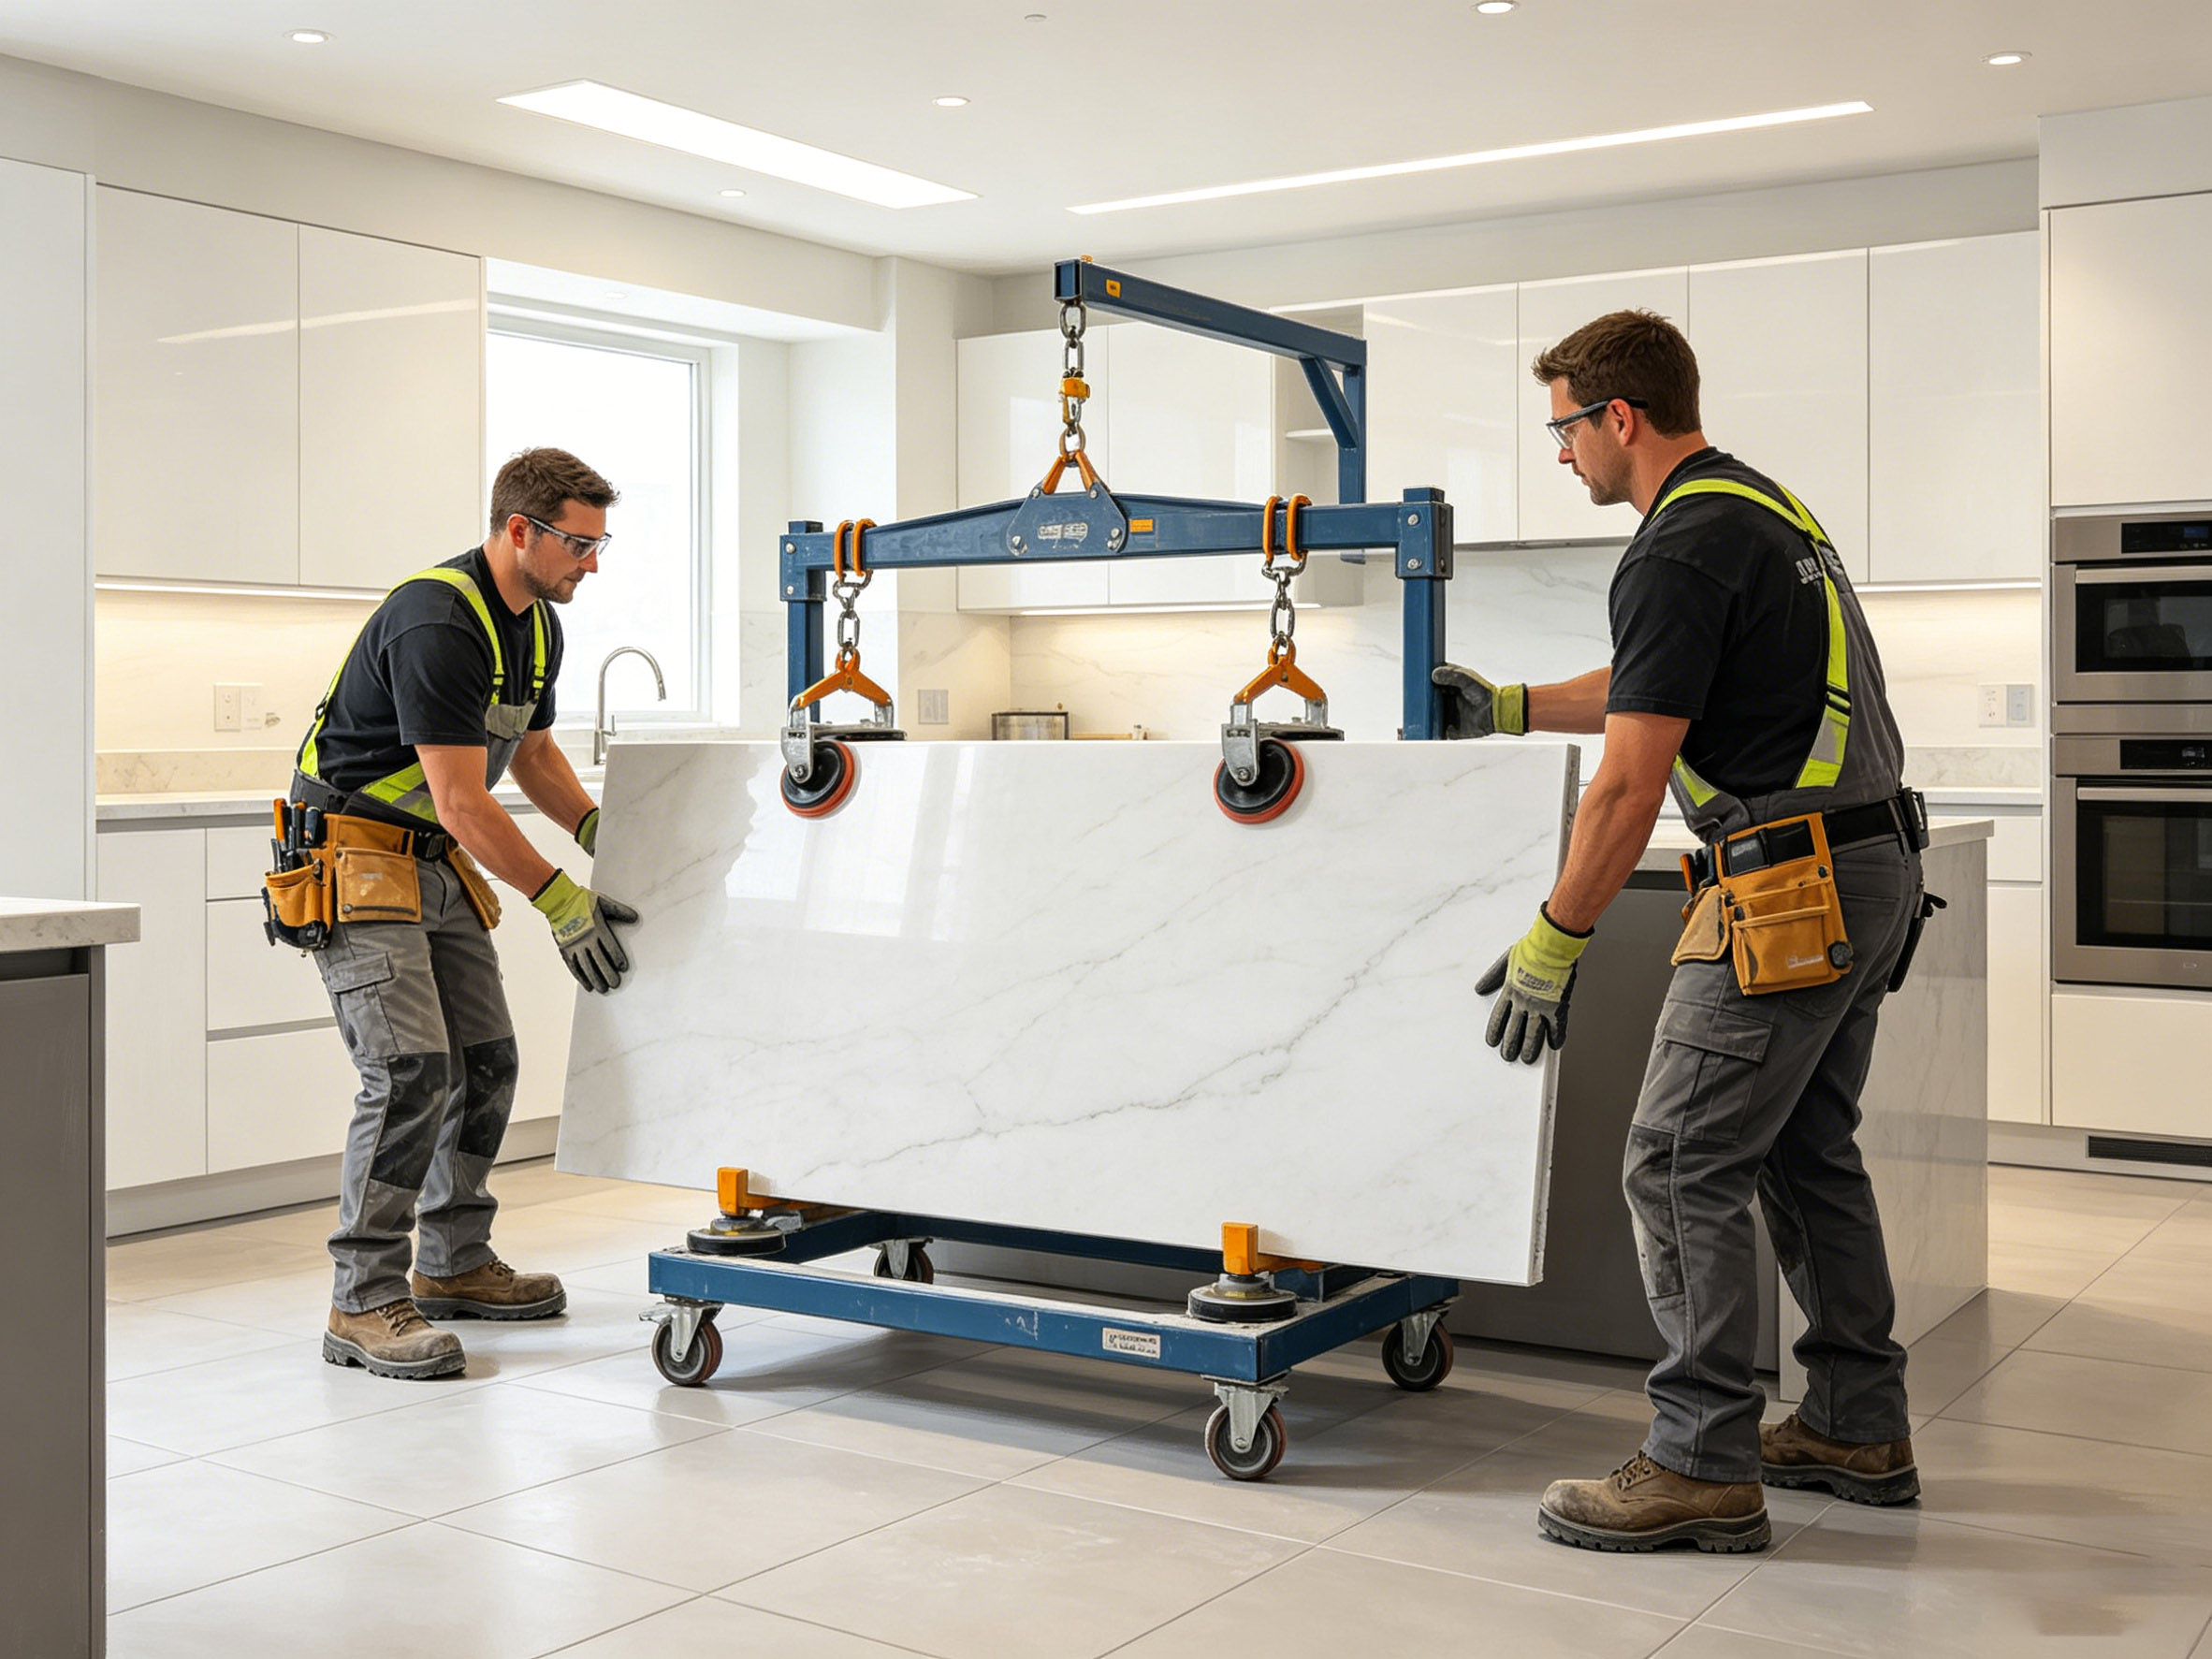
Quartz slabs are heavy. A standard 20mm-thick slab weighs approximately 6-8 kilograms per square foot. A typical kitchen island countertop can weigh over 100 kilograms. Proper lifting equipment and adequate help are essential. Use slab carts, suction cup lifters, and at least two strong assistants for handling.
Wear appropriate safety gear throughout the installation. Safety glasses, cut-resistant gloves, steel-toed boots, and dust masks are required during cutting and fitting. Ensure your workspace is clear, well-lit, and has adequate ventilation. Remove all obstacles from the installation path before moving slabs.
Verify that your cabinets are level and structurally adequate before beginning. Countertop weight is considerable. Cabinets must support the load without deflection. Use shims to level cabinets if necessary. The maximum allowable deviation across the cabinet tops is 3mm over 3 meters.
Tools and Materials Required
Tools Required: Tape measure, level (minimum 1.2m), circular saw with diamond blade, jigsaw with diamond blade, angle grinder with polishing pads, drill with diamond hole saw bits, caulking gun, rubber mallet, clamps, vacuum cleaner, notched trowel, sponge and bucket, pencil, straight edge.
Materials Required: Quartz slab pieces, high-strength construction adhesive (polymer-based recommended), silicone sealant (clear or color-matched), shims, plywood strips for support, cleaning solvent, masking tape, fine-grit sandpaper.
Diamond blades are essential. Standard masonry blades will not cut quartz effectively and may shatter. Use continuous-rim diamond blades rated for engineered stone. These cut smoothly and reduce edge chipping. Budget approximately $50-$100 for a quality diamond blade.
Step 1: Measure and Template Preparation
Accurate measurement is the foundation of successful installation. Measure each cabinet section individually. Walls are rarely perfectly square. Record measurements for the front edge, back edge, and both sides. Note any obstructions such as outlets, plumbing, or uneven walls.
For complex installations, create a full template using 6mm plywood or cardboard strips. Cut strips to width and hot-glue them together to form the exact countertop shape. Place the template on the cabinet tops and trace around all edges. Mark sink locations, cooktop cutouts, and faucet holes.
Transfer template measurements to the quartz slab with a pencil. Add 3mm overhang on the front edge and sides. The back edge should fit flush against the wall. Check measurements twice before cutting. Mistakes in this stage are costly and difficult to correct.
Step 2: Cutting the Quartz Slab
Cutting quartz requires the right technique to prevent chipping and cracking. Set up the slab on a stable, padded work surface. Mark cut lines clearly with pencil and masking tape. The tape helps prevent edge chipping during cutting.
For straight cuts, use a circular saw with diamond blade. Cut from the finished face side to minimize chipping on the visible surface. Cut at a steady, moderate speed. Do not force the blade. Water cooling is essential for long cuts.
For sink cutouts and cooktop openings, drill starter holes at each corner using a diamond hole saw. Use a jigsaw with diamond blade to cut between the holes. Support the cutout piece from underneath to prevent it from falling and damaging the edge.
Edge profiling follows cutting. Use an angle grinder with progressively finer diamond polishing pads. Start with 50-grit for shaping, progress through 100, 200, 400, 800, and 1500-grit for polishing. Water cooling during polishing prevents heat damage and produces a consistent finish.

Step 3: Dry Fit and Adjust
Before applying adhesive, position all cut slabs on the cabinets for a dry fit. Check for level, alignment, and fit. Verify that seams between slabs are tight with no visible gaps. Use shims to correct minor level issues. Mark any areas requiring adjustment.
Check the sink and cooktop cutouts against the actual fixtures. Confirm that undermount sinks fit properly within the cutout. Verify that cooktops drop in without binding. Address any fit issues before proceeding to adhesive.
If seams are required between slabs, inspect the seam fit carefully. A gap of less than 0.5mm is acceptable for filling with color-matched seam adhesive. Larger gaps indicate measurement or cutting errors that need correction.
Step 4: Applying Adhesive and Setting Slabs
Apply high-strength construction adhesive to the cabinet tops in a serpentine pattern. Use enough adhesive to create full contact but not so much that it squeezes out excessively. Apply adhesive within 10 minutes of setting the slab to prevent skinning.
Lift the slab into position carefully. Use suction cups for better control. Lower the slab onto the adhesive. Press firmly along the entire surface. Use a rubber mallet with a padded block to tap the slab into level contact with the cabinets. Check level in both directions immediately.
For large L-shaped or U-shaped kitchens, install corner sections first and work outward. This ensures proper alignment at the critical junction points. Allow the adhesive to cure for 24 hours before applying any weight or stress to the countertop.
Step 5: Seam Assembly
Seam assembly is the most skill-intensive part of quartz installation. Clean both seam edges thoroughly with solvent. Apply masking tape along the seam line on both sides. Mix color-matched epoxy adhesive according to manufacturer instructions. Apply the adhesive to both seam edges.
Join the slabs together using seam clamps. Tighten clamps evenly to draw the seam closed. Remove excess adhesive immediately with a plastic scraper before it hardens. Wipe the surface clean with solvent. Allow the seam adhesive to cure for the recommended time before removing clamps.
After curing, use a razor blade to remove any remaining adhesive residue. Polish the seam area with fine-grit pads to blend the surface finish. A properly executed seam should be nearly invisible.
Step 6: Sink and Fixture Installation
For undermount sinks, apply a bead of silicone sealant to the sink rim. Position the sink from below and secure with sink clips. Tighten clips evenly to create a uniform seal. Allow silicone to cure for 24 hours before running water.
Install faucets and fixtures after the sink is secured. Apply plumber’s putty or silicone under fixture bases. Tighten mounting nuts securely but avoid over-tightening that could crack the quartz. Connect water supply lines and test for leaks.
For drop-in cooktops, apply a bead of silicone sealant around the cutout edge. Lower the cooktop into position. Secure with mounting brackets provided by the manufacturer. Connect electrical or gas connections according to local codes.
Step 7: Applying Silicone Sealant
Apply a thin bead of silicone sealant along the wall-countertop junction and any other transition points. Use clear silicone for minimal visibility or color-matched silicone to blend with the quartz. Smooth the bead with a wet finger or silicone tool for a clean finish.
The silicone sealant serves both aesthetic and functional purposes. It prevents water from penetrating between the countertop and wall or backsplash. It also accommodates minor movement between materials without cracking. Properly applied sealant lasts 3-5 years before requiring replacement.
Step 8: Final Inspection and Cleanup
Allow all adhesives and sealants to cure fully before using the countertop. Remove all masking tape. Clean the entire surface with mild soap and water. Inspect all seams, edges, and cutouts for quality. Check that the countertop is level and properly aligned with cabinets.
Test sink drains for leaks. Verify cooktop operation. Check faucet function and water pressure. Document any minor issues for follow-up. A thorough final inspection prevents problems that would be difficult to address after the kitchen is in active use.
When to Call a Professional
While this guide covers DIY installation, certain situations warrant professional involvement. Large or complex-shaped slabs, multiple seams in visible locations, waterfall edges, and integrated sinks all benefit from professional experience. If your kitchen requires more than two seams or includes angles other than 90 degrees, consider hiring an experienced countertop installer.
Professional installation typically costs $30-$50 per square foot. This includes template creation, cutting, seam work, and installation. For a typical 30-square-foot kitchen, professional installation costs $900-$1,500. When weighed against the cost of mistakes and material waste, professional installation often represents good value.

Conclusion
Installing quartz kitchen countertops yourself is a rewarding project that can save significant costs. Success depends on careful planning, precise measurements, proper tools, and patience at every step. Follow this guide systematically, and your DIY quartz countertop installation will deliver professional-quality results. For premium quartz slabs from Apex Quartz Stone, visit the website for product specifications and technical support.
Post time: Jun-15-2026