
By Yvonne Deng
Key Takeaways
- Most quartz countertop damage is repairable: chips, edge nicks, dull scratches, hairline cracks, and open seams all respond to colour-matched epoxy and wet sanding.
- Repair economics are decisive: DIY chip repair costs $15-40, professional repairs run $100-350, while slab replacement runs $1,500-4,000. Attempt repair first, almost always.
- A chip can be fixed in about 45 minutes of active work — clean, fill proud, cure, sand through three grits, and polish.
- The one non-negotiable exception: a crack running fully through the slab is a structural event. Stop using the countertop and get a professional assessment before anything else.
- Repair difficulty scales with pattern drama. Light and mid-tone slabs hide repairs well; dark, high-gloss, or heavily veined surfaces are where professional colour blending earns its fee.
Panic is the first reaction, and it is also the most expensive one. A dropped cast-iron pan, a sliding blender base, a heavy pot meeting a seam — within seconds there is a chip, a scratch, or a fissure in a surface you paid thousands for. The instinctive thought is replacement. The professional thought is repair, because quartz is one of the most repairable countertop materials on the market, and most damage can be fixed in under an hour for less than the cost of dinner for two.
I have overseen quartz production and worked with fabricators across twenty countries for over a decade. In that time I have seen countertops come back from near-death experiences — and I have seen well-meaning owners make small problems permanent with the wrong tools. This guide is the repair playbook I wish every homeowner had: what can be fixed, what cannot, how to do the common repairs yourself, and exactly when to hand the job to a professional.
What Kind of Damage Can Be Repaired on a Quartz Countertop?
Nearly everything short of structural failure. Quartz’s engineered structure — roughly 90-93% natural quartz bound in a resin matrix — means localised damage stays localised, and that is precisely what makes it repairable. The resin can be matched, the quartz aggregate can be mimicked, and the factory polish can be reproduced with grits and compounds.
| Damage Type | Repairable? | DIY or Pro? | Typical Cost |
|---|---|---|---|
| Chip or edge nick | Yes — the most common and easiest fix | DIY (small), Pro (large) | $15-40 kit / $100-250 pro |
| Dull surface scratches | Yes, with buffing compounds | DIY | $20-50 |
| Deep scratches (catch a fingernail) | Yes, with wet sanding + re-polish | DIY or Pro | $30-80 DIY / $150-250 pro |
| Hairline surface crack | Yes, if non-structural | Pro recommended | $150-350 |
| Full-thickness crack | No — structural failure | Pro assessment; often replacement | $1,500-4,000 |
| Open or discoloured seam | Yes | Pro recommended | $150-350 |
| Burn marks | Surface burns yes; deep burns no | Pro for deep burns | $50-200 |
The pattern is simple: if the damage is in the top few millimetres of the surface, it can be repaired. If the damage compromises the full thickness of the slab, it becomes a structural conversation. Everything else is craft.
How Do You Repair a Chip on a Quartz Countertop?
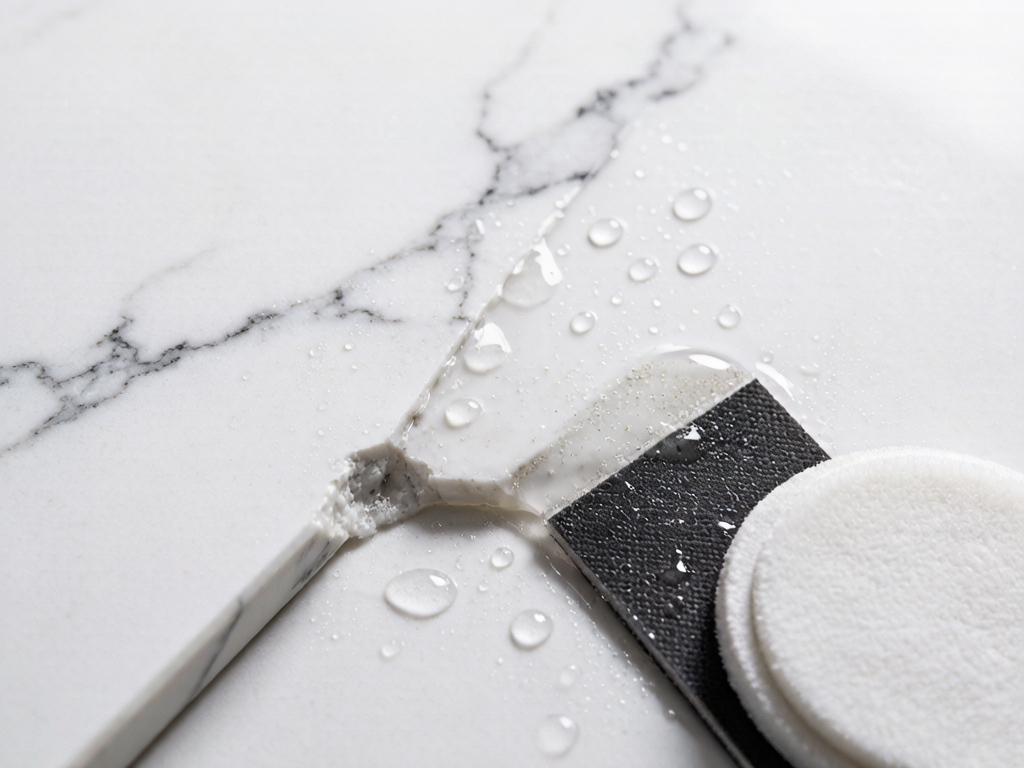
A chip is a missing piece of the surface — at an edge, a corner, or along a seam. It is the most repairable of all quartz damage because the repair fills a defined void, and the surrounding surface gives you a perfect reference for colour and texture.
Here is the five-step process that works for chips up to roughly the size of a coin:
- Clean and dry the area. Wipe with isopropyl alcohol and let it dry fully. Oil, dust, or moisture between the resin and the stone is the number one cause of failed chip repairs.
- Mix colour-matched resin. Most quartz repair kits include a two-part epoxy plus pigments. Blend to match the base tone of the countertop — not the veining. Test the mix on masking tape before committing.
- Fill slightly proud. Press the resin into the chip with a plastic knife, overfilling by about 1mm. Overfilling is intentional: sanding needs material to work with, and underfilling leaves a dip you cannot fix later.
- Let it cure completely. Follow the kit’s cure time — typically 12-24 hours. Resist the urge to speed things up with heat, which can trap bubbles that show as pinholes.
- Sand wet, through three grits. 600 grit to level, 1500 to refine, 3000 to prepare for polish. Always sand wet. Finish with a quartz-safe polishing compound and buff to a sheen.
Can Scratches Be Buffed Out of Quartz?
Yes — but only if you correctly identify which of the two scratch types you are facing. Run a fingernail across the mark. If the nail does not catch, the scratch has dulled the polish without removing material, and a buffing compound alone will restore it. If the nail catches, the scratch has cut into the surface, and it needs wet sanding before polishing.
For polish-level scratches, use a quartz-safe polishing compound (never a generic abrasive polish) on a soft cloth or a slow-speed polisher. Work in small circles, check frequently, and stop the moment the scratch disappears — over-polishing creates a lighter patch that is its own problem.
For material-level scratches, repeat the wet-sanding ladder from the chip repair: 600, then 1500, then 3000 grit, then polish. Two cautions apply:
- Test in an inconspicuous spot first — under the sink overhang, where a mismatch will not be seen.
- Honed and textured finishes are a different game. Reproducing a matte or leather finish by hand is genuinely difficult; a professional with the right pads is the safer call for these surfaces.
When Can a Cracked Quartz Countertop Be Fixed?
A hairline crack — one you can barely see and that does not grow — can be stabilised. Thin epoxy is worked into the fissure, allowed to cure, and polished flush. The result is a cosmetic fix that also prevents the crack from collecting moisture and debris. This is a professional’s job in most cases, because getting epoxy deep into a fine crack without air pockets takes technique.
A full-thickness crack is different territory entirely. If you can see the crack from underneath, if it runs from an edge inward, or if it lengthens over days, the slab’s structural integrity is compromised. The countertop is no longer a question of cosmetics — it is a safety question.
Open Seams and Discoloured Joints: The Quiet Repairs
Seams fail in two ways, and both are fixable. An open seam — a visible gap where two slabs meet — is re-filled with colour-matched adhesive, clamped or weighted during curing, then sanded and polished flush. A discoloured seam, usually a dark or yellowed line, is ground out and redone entirely; patching over it only delays the visible result.
Seam repairs deserve a professional for one practical reason: clamping. Getting two heavy slabs to sit perfectly level while adhesive cures requires the same rigs used in the original installation. A DIY seam repair that sets slightly proud becomes a permanent lip that catches knives and crumbs.
Stain Removal for the Damage That Is Not Damage
Quartz is non-porous, so true staining is rare — but it is not impossible. The usual culprits are set-in grease films, turmeric, and pigments that sat on the surface for days, leaving a residue that resists normal cleaning. The repair here is not sanding; it is chemistry.
Apply a poultice of baking soda and water (or a dedicated quartz stain remover) over the mark, cover with plastic wrap, and leave it for 12-24 hours. The poultice draws the residue out of the microscopic surface texture. Repeat if needed. What you should never do is attack the stain with abrasives or acidic cleaners — both will damage the resin polish and turn a residue problem into a surface problem.
DIY Repair or Professional: How Do You Decide?
The decision framework is refreshingly simple once you know the three variables: size, finish, and confidence.
- DIY confidently: chips under a coin’s size, polish-level scratches, and residue stains on light or mid-tone polished finishes.
- Call a professional: cracks of any kind, seam repairs, dark or high-gloss finishes, honed or textured surfaces, and any damage larger than a coin.
- When in doubt, spend the $150 consult. A professional assessment of a suspicious crack costs a fraction of what a failed repair or a collapsed slab will.
One more consideration: warranty. If your countertop is still under its installation or manufacturer warranty, document the damage with photos before touching anything. Some warranties are voided by DIY repair attempts, while others require a certified repairer to maintain coverage. A five-minute call to your supplier beats a voided warranty.
Why Some Slabs Need Far Fewer Repairs
Repair is a skill; prevention is a system — and the system starts at the factory. Slabs produced under disciplined quality control have fewer micro-defects, more consistent resin distribution, and denser surfaces, which translates directly into fewer chips, scratches, and cracks over a countertop’s life.
This is not marketing language; it is measurable. In our own production records, slabs that pass spectrophotometer colour checks and density testing show significantly lower field-repair callbacks than batch lots with looser tolerances. When you choose a slab, the factory’s quality control process is part of your repair budget — good QC is the repair you never have to make.
And when a countertop is beyond repair — the full-thickness crack, the multi-site failure — the replacement conversation starts with choosing the right material again. Browsing the full quartz product range or the pure and super white series is where most owners begin, and it is also where they usually discover that the replacement slab’s polish and density are noticeably better than what they lived with for a decade.
Frequently Asked Questions
Can quartz countertops be repaired?
How much does quartz countertop repair cost?
Can you fix a burn mark on quartz?
How do you fix a crack in a quartz countertop?
Will a quartz repair be visible?
Can scratches be buffed out of quartz?
Is it worth repairing a quartz countertop or replacing it?
Repair First, Replace Never-If-You-Can-Help-It
The takeaway from a decade of watching countertops survive their owners is this: quartz rewards patience. A chip is a 45-minute job with a $30 kit. A scratch is a Saturday morning. A seam is a professional’s afternoon. Only the structural crack — the one that runs through the slab like a fault line — truly ends the conversation.
Start with the smallest intervention that could work. Document the damage. Match the colour. Sand wet, through the grits, and stop polishing the moment the repair disappears. And if a repair is beyond your comfort zone, that $150 professional visit is the cheapest insurance you will ever buy for a $4,000 surface.
If your countertop is beyond repair and you are choosing a replacement — or if you want a slab engineered to survive the next decade — browse the product range or talk to our team about density-tested, colour-consistent slabs that keep the repair kit in the drawer where it belongs.
Post time: Aug-11-2026