
Quartz countertops take heat damage in the resin, not in the stone. The quartz mineral inside an engineered slab is stable to about 573 °C and is not the component that fails; the polymer resin that holds 7 to 10 percent of the slab together is. Visible damage usually starts with surface contact above roughly 150 °C, and cookware taken directly off a gas hob or out of a 230 °C oven can present a base temperature of 200 to 350 °C. The practical rule that follows is simple and non-negotiable: nothing that has been on a flame or in an oven touches bare engineered stone, ever. A trivet or hot pad is not a courtesy to the surface — it is the only thing standing between a 300 °C pan and a resin matrix that begins to soften somewhere near a tenth of that.
I say this having spent years on the receiving end of the photographs. Somebody’s pan comes off the hob, lands on the island “just for a second,” and by the time dinner is served there is a pale ring where the surface used to be black and reflective. Because engineered quartz has almost no porosity — water absorption sits below 0.05 percent of dry mass under ASTM C97 test methods — nothing soaks in and nothing evaporates out; whatever happens at the surface stays at the surface, permanently. On a honed finish you might not notice. On a polished one, that ring is visible from the doorway for the next fifteen years.
This article is not a chemistry lecture, and it is not a list of things you should already know. It is the sequence I actually walk a customer through: identify the mark, understand which mechanism produced it, then decide between living with it, repairing it, or replacing a section. Along the way I will give you the trivet numbers from a test we ran on our own slab, because the trivet aisle is full of confident advice and almost none of it is measured.
TL;DR
- Heat damage to engineered quartz happens in the polymer resin binder, not the quartz mineral, because the mineral’s crystal structure is stable to about 573 °C while the resin can soften and discolour from roughly 150 °C of contact heat upward.
- A dull pale bloom, a yellow-brown scorch, a grey ghost patch, and a crack are four different mechanisms with four different repair prospects — only the first and sometimes the last are recoverable.
- Simmering appliances are more dangerous than flashing pans: a slow cooker or air fryer holding 80 to 120 °C against the resin for three hours does more cumulative damage than a 250 °C pan that touches down for ninety seconds.
- Trivet performance is driven by thickness and geometry rather than brand or material name — an 8 mm cork pad held the interface near 74 °C after 5 minutes under our 250 °C test pan, while a thin silicone mat measured about 141 °C.
- Seams, sink cutouts, and inside corners concentrate thermal stress, so a pan placed in the open centre of a countertop often survives an event that the same pan beside a cutout does not.
- After an accident, let the area cool on its own for 30 to 60 minutes, then inspect under raking light and take a glossmeter reading before you decide anything.
Why the Quartz Survives and the Resin Does Not
Engineered quartz fails under heat because it is not a single material — it is a composite of hard mineral and soft polymer, and heat attacks the two halves differently. A typical engineered slab runs around 90 to 93 percent graded quartz aggregate bound with 7 to 10 percent resin, plus a small pigment fraction. The quartz half is extraordinarily heat-stable: as Britannica’s reference on quartz describes, alpha-quartz holds its structure up to about 573 °C, at which point the tetrahedral framework twists into the beta form, and transformation to tridymite does not begin until roughly 867 °C. In kitchen terms that mineral is functionally inert.
The resin half is where every heat mark in the world originates. Polymer resins used as stone binders are characterised in part by their heat deflection behaviour, and the standard method for that measurement is ASTM D648, which determines the temperature at which a loaded plastic bar deforms by an arbitrary amount under defined conditions. Resins in this family deflect well before they decompose, and that is precisely the window where a countertop acquires a mark: the resin has not burned, it has softened, and softening releases pigment migration and micro-roughening that survive the resin hardening again.
This is why manufacturers are careful with their wording. Every quartz brand in the market describes its surface as heat resistant rather than heat proof, and — this is the part buyers dislike — most decline to publish a single safe temperature. I understand why they decline. Resin formulations differ, thicknesses differ, colour loads differ, and a number that is honest for one slab can be misleading for the next. Because the temperature at which visible damage appears depends on the specific resin system in the specific slab in front of you, the only defensible universal number is a conservative contact limit rather than a maximum rating, and 150 °C is the conservative limit we give our own customers.
One asymmetry is worth internalising, because it inverts most people’s intuition. A very hot pan that touches the surface briefly does localized, surface-layer damage. A warm appliance that sits there for hours does something slower and more thorough — it holds the resin in its softening range for long enough that the change becomes structural rather than cosmetic. Because sustained heat at 80 to 120 °C keeps the resin near its deflection window for the entire appliance cycle, a three-hour slow cooker on bare stone is frequently worse for the countertop than a momentary 250 °C contact. I would rather a customer put a pan down carelessly for ten seconds than run an air fryer bare for an afternoon.
Four Marks, Four Mechanisms: Identify Yours First
Before you polish, clean, or call anyone, identify which of the four heat marks you are looking at, because the repair path for each is different and two of the four get worse if you treat them like the others. This is the step customers skip, usually because the marks all look like “a stain” in a phone photograph. Put a single raking light across the surface at 10 to 15 degrees and they separate immediately.
| Contact temperature band | What happens at the surface | Everyday example |
|---|---|---|
| Below ~60 °C | Nothing measurable; the resin stays well inside its elastic range | A mug of coffee, a warm plate, a rested kettle |
| 60–120 °C, sustained | Resin slowly dulls and can yellow over a long exposure; gloss drops without any visible ring | Slow cooker, air fryer, or griddle base running for 2–4 hours |
| 150–230 °C, brief | A pale matte ring appears where the surface gloss is lost; pigment may migrate slightly | A pan taken off a hob and set down for under 60 seconds |
| Above ~230 °C, or rapid quench | Resin scorches to yellow-brown, may bubble, or a crack opens at a seam or cutout | A roasting tray straight from a 230 °C oven; cold water poured on a hot zone |
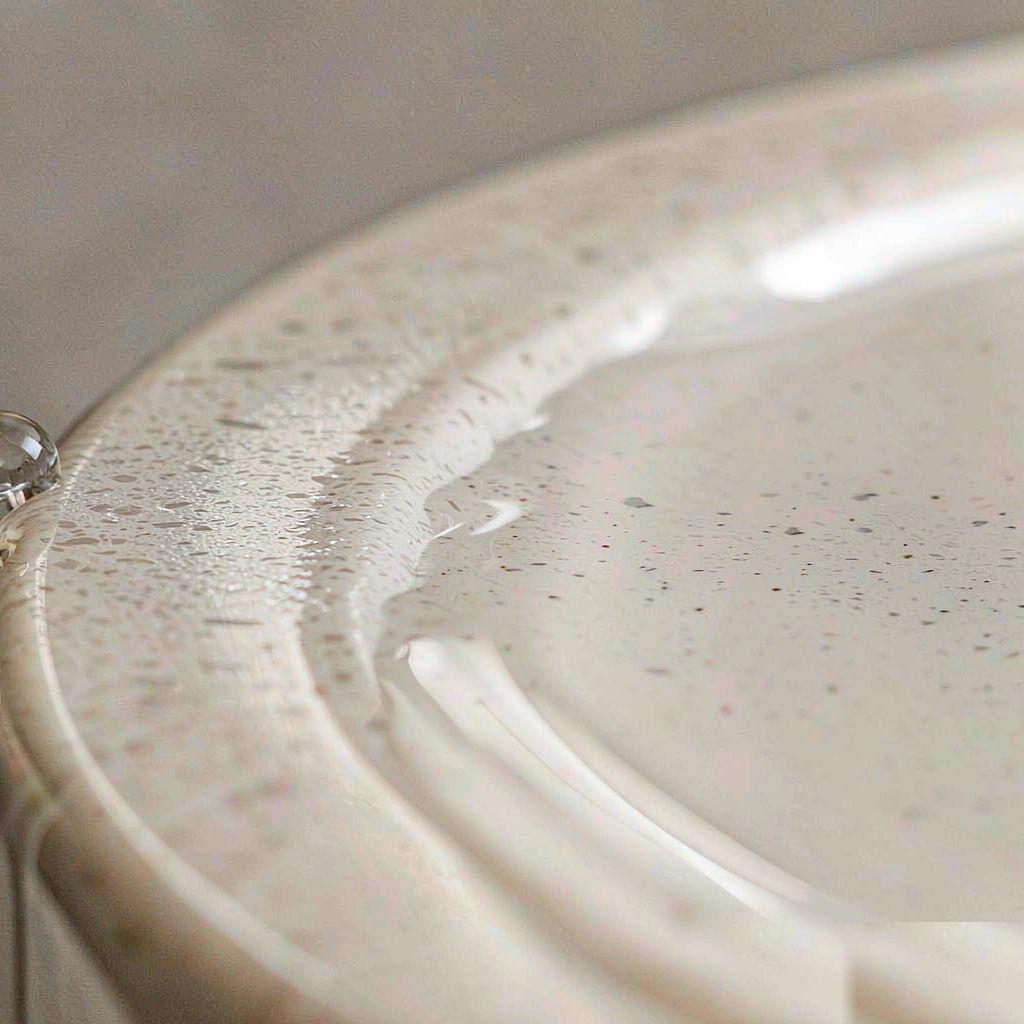
The dull white bloom
This is the mildest and the most common outcome: a matte, slightly whitish ring where the gloss used to be, with no colour change. The mechanism is micro-roughening of the resin surface layer — the polish has been disrupted without the resin being chemically altered. In my experience perhaps one bloom in three can be substantially improved by a professional fabricator re-polishing the area, and this is the one heat mark where I will suggest trying it. Ask the fabricator to test on the underside or an offcut first. If the underside of your slab is the same body, you have a free test sample built into the installation.
The yellow-brown scorch
Here the resin has actually changed. The discolouration is oxidation products and migrated pigment sitting inside the matrix, which means it extends into the body rather than resting on top of it. Polishing removes surface material, so polishing a scorch removes gloss and leaves the colour behind — you end up with a scorched patch that is also now dull, which is a worse outcome than the one you started with. Because the colour lives inside the resin rather than on the surface, no cleaner, poultice, or abrasive removes a scorch — the only real answers are a section replacement or accepting the mark.
The grey ghost patch
Grey rather than yellow, soft-edged rather than crisp, and usually in a spot where nobody set a pan — this is polish burn rather than heat damage, produced when a polishing head lingers and overheats the resin during manufacturing. It arrives on the slab rather than being caused by the customer. It is included here because it is routinely misdiagnosed as heat damage in the first weeks after installation, and because that misdiagnosis sends people down a repair path that makes it worse. If the mark was visible the day the countertop was installed, it is not your pan.
The crack
Cracking from heat is a thermal-shock failure, not a melting failure, and it almost always appears at a seam, a sink or cooktop cutout, an inside corner, or a narrow strip of stone behind an appliance. The mechanism is straightforward differential expansion: linear thermal expansion is measured under ASTM E228 using push-rod dilatometry precisely because designers need to know how a material behaves dimensionally under a temperature excursion and what thermal stresses that creates in a composite. Heat one zone of a slab while the surrounding stone stays cool and the heated zone tries to grow against material that resists it. A crack is where that argument gets resolved. Because a discontinuity in the stone plane concentrates the stress, the practical protection is geometric rather than thermal: keep hot items at least 100 mm clear of any seam, cutout, or inside corner, and let the geometry work in your favour.
What the Trivet Aisle Doesn’t Tell You
A trivet works in one of two ways — either it puts an air gap between the pan and the stone, or it interposes a material that conducts heat poorly — and most products sold as trivets do neither of those things well. That is the entire finding of a bench test we ran on our own slab, and it surprised me enough that it changed what we tell customers.
The test setup was deliberately crude, because the point was to compare options rather than to produce a laboratory-grade data set. We clamped a K-type thermocouple at the interface between the countertop surface and whatever was interposed, heated a 2.5 kg cast-iron pan on a gas hob to a measured 250 °C, transferred it, and logged the interface temperature every 30 seconds for 15 minutes. Three runs per material, ambient 26 °C, mean of the three runs reported. The slab was a 20 mm polished white engineered quartz body.
| Interposing material | Interface temp at 5 min | Interface temp at 15 min | What we concluded |
|---|---|---|---|
| Bare surface (control) | ~238 °C | ~214 °C | The pan is still cooking the stone long after the mark is made |
| Folded cotton towel (2 layers) | ~168 °C | ~151 °C | Fabric slows the rise and then passes the heat straight through |
| Thin silicone mat (3 mm) | ~141 °C | ~127 °C | Tolerates heat well; insulates poorly because it is thin and dense |
| Solid wooden board (20 mm) | ~96 °C | ~88 °C | Good insulator while dry; a damp board behaves like the towel |
| Stainless wire rack (10 mm stand-off) | ~82 °C | ~74 °C | The air gap does the work, not the metal |
| Cork pad (8 mm) | ~74 °C | ~67 °C | Best performer per millimetre of thickness on the bench |
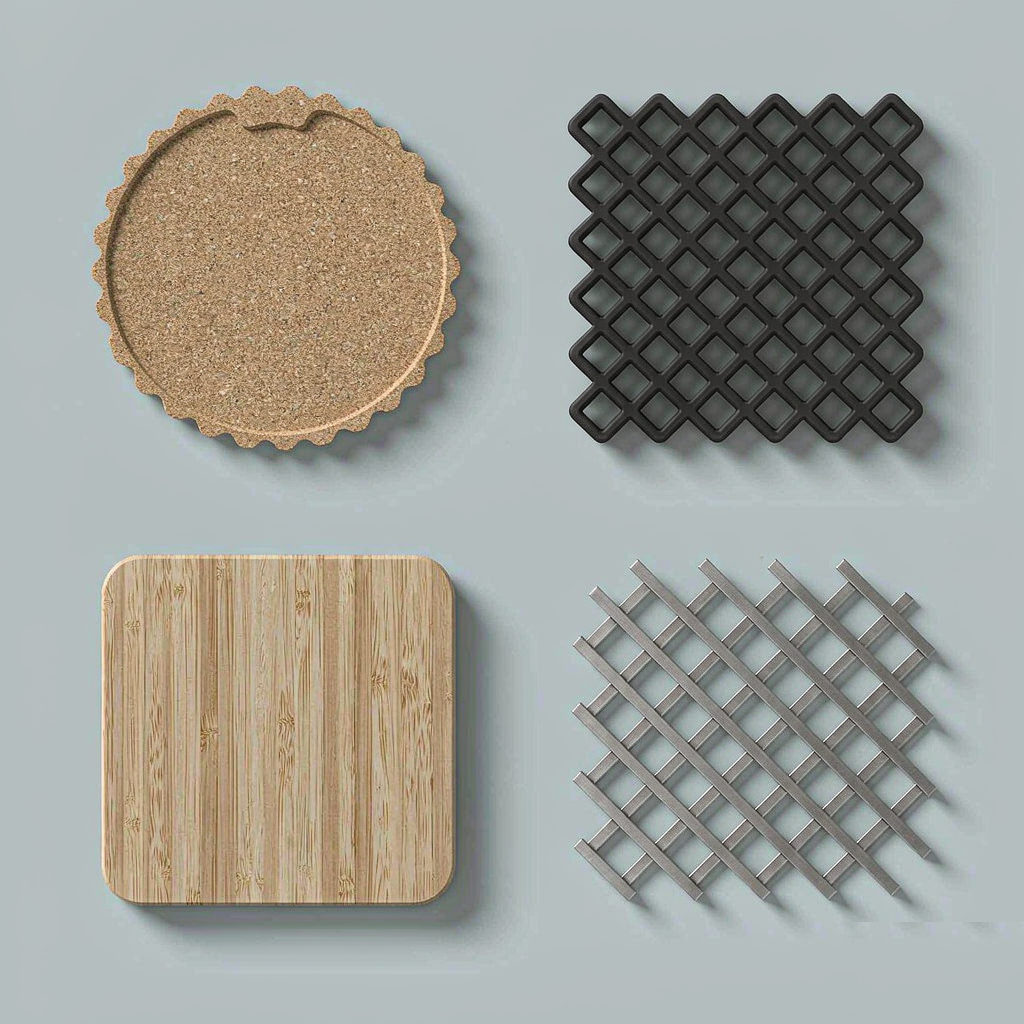
Read the columns honestly and two things fall out. First, the difference between the best and worst option is roughly a factor of three at the five-minute mark, and the bare control is worse still. Second, the ranking tracks thickness and trapped air almost perfectly. Cork wins because a cork cell is mostly air, so an 8 mm cork pad is effectively 8 mm of insulation with a thin skin around it. The stainless rack places second despite being metal because the 10 mm air gap between the pan base and the stone is doing the real work. The folded towel places where it does because once two layers of cotton are saturated with heat they become a conductor with no gap at all.
The surprise for most customers is silicone. It is an excellent material that tolerates 200 °C plus without degrading, and it is sold on that basis — but heat tolerance and heat insulation are different properties, and a 3 mm dense silicone mat passes heat far more effectively than an 8 mm cork pad does. If you like silicone for the grip and the dishwasher, buy the thickest one you can find and understand that you are buying tolerance rather than protection.
The Six Rules We Give Our Own Customers
Prevention on an engineered quartz surface reduces to six habits, and every one of them is about the same idea — never let concentrated heat meet the resin without something in between. These are the rules we print, and they are the rules I follow in my own kitchen.
- Nothing that has been on a flame or in an oven touches bare stone, not even for a second. The reflex of placing a pan down “just while I reach for the plate” is the single most common cause of heat damage, because the mark forms within seconds at 250 °C.
- Keep the trivet where the heat is, not where it is stored. A trivet in a drawer is a trivet that will not be used. Two pads permanently beside the hob and one beside the oven eliminate the moment of hesitation that precedes most accidents.
- Keep hot items at least 100 mm away from seams, sink cutouts, cooktop cutouts, and inside corners. These are the points where thermal stress concentrates, and they are where the cracks appear.
- Move simmering appliances onto a board or stand-off rack for the whole run. Slow cookers, air fryers, griddles, rice cookers, and portable induction plates hold their base at 80 to 120 °C for hours, which is a sustained soak rather than a flash.
- Never quench a hot zone with cold water or ice. Let it cool for 30 to 60 minutes. Rapid cooling creates the differential contraction that opens cracks, and this is the failure mode most likely to turn a cosmetic event into a structural one.
- Keep the pad dry. Steam transfers heat more aggressively than dry air does, and a damp towel is one of the worst interfaces available — worse than many bare surfaces in terms of peak transfer rate at the moment of contact.
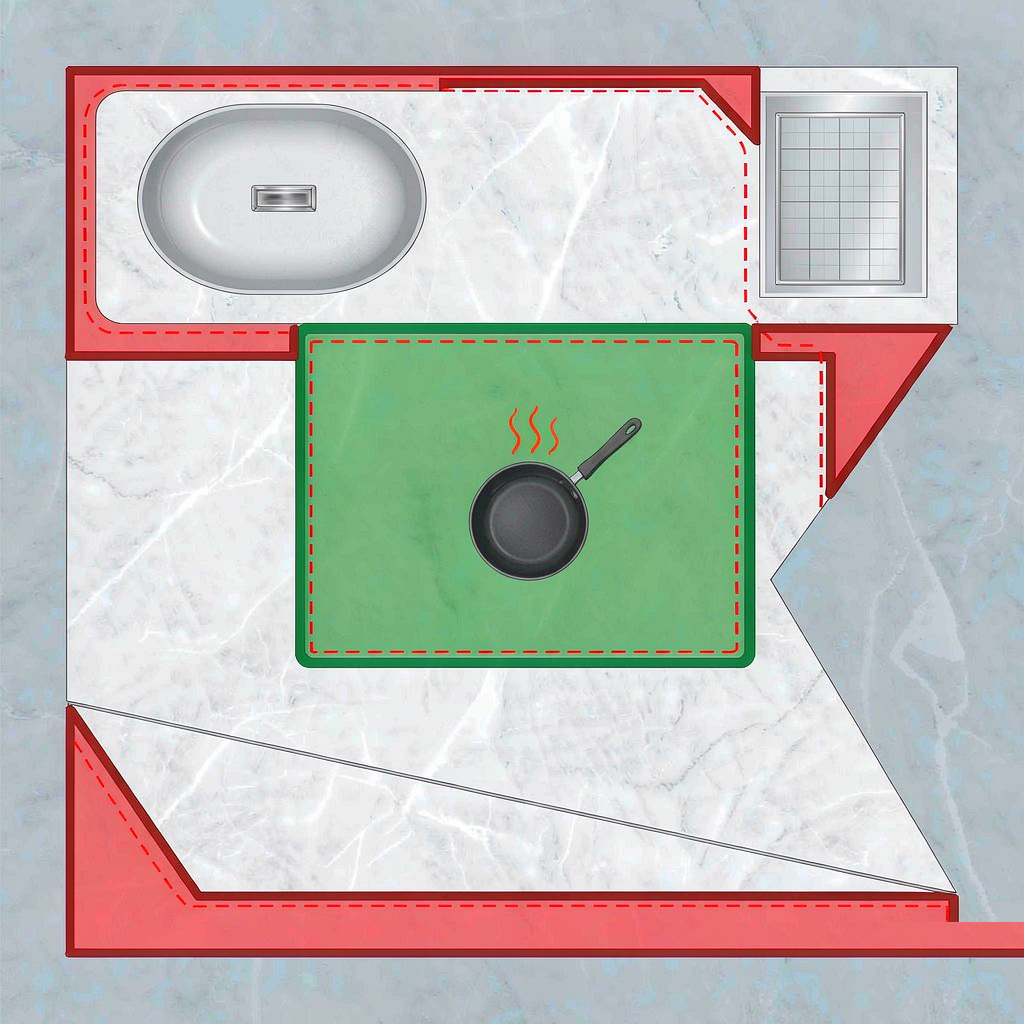
If you take only one of the six, take the first. Every heat-damage photograph I have ever been sent comes with the same sentence attached — “I only put it down for a moment” — and the moment is exactly the problem, because the interface temperature spikes within the first ten seconds and the resin does not care how long the pan stays afterwards.
After an Accident: What to Do in the First Hour
After a hot item has been on the surface, the correct sequence is cool, inspect, and classify — and the sequence matters because intervening early is what turns a recoverable mark into an unrecoverable one. Here is what I tell people, in order.
Move the pan and walk away for 30 to 60 minutes. Do not wipe, do not apply anything, and above all do not apply cold water. When the surface is back to room temperature, put a single raking light across the area at a shallow angle and look at the mark’s edge. A crisp edge with no colour change points to a bloom. A soft, spreading edge with a yellow or brown tint points to a scorch. Then take a reading with a glossmeter if you or your fabricator has one, and compare it against an untouched area on the same slab — because gloss is the fast, objective way to tell a surface bloom from a resin change, and a drop of more than about 20 gloss units at 60 degrees usually means the resin itself has altered rather than merely the polish.
Then make the decision, and be honest with yourself about the trade. A bloom is worth a professional re-polish attempt. A scorch on an island will be seen every day for years, and a section replacement is often worth it in a premium kitchen and rarely worth it in a rental property. A crack is a different conversation, because it affects continuity rather than appearance — a crack at a seam can often be re-epoxied and dressed, while a crack through a cutout edge needs a structural assessment before a repair decision.
And if you are the fabricator or the dealer rather than the homeowner, one piece of professional advice: photograph the mark under raking light before you touch it, and take the glossmeter reading before as well as after. Because a heat mark’s classification is genuinely arguable between a bloom and a scorch, having a measured baseline protects both you and the customer from a disagreement that photographs alone cannot settle. I have watched a good fabricator lose that argument purely because nobody recorded the number first.
One honest limitation before the FAQ. Manufacture-side, we do not publish a single safe temperature for our own surfaces, and I would treat any brand that does with some caution. Resin systems differ between factories, colour loads differ between designs, and thickness changes the thermal mass. The 150 °C contact figure we give is a conservative working limit that will keep a properly made slab out of trouble, not a measured failure threshold for every product on the market. If you need a number for a specification document, ask your specific supplier for their own guidance and get it in writing.
Frequently Asked Questions
Protect the Surface, and Choose a Surface Worth Protecting
The heat conversation comes down to one habit and one specification: keep a dry, thick, stand-off pad within arm’s reach of every heat source, and buy a slab whose resin system you trust to behave predictably when a mistake inevitably happens. No countertop material in the kitchen is truly heat proof; what separates good installations from bad ones is how forgiving the surface is when someone’s attention lapses for ten seconds.
If heat resistance sits high on your specification list and you want the surface itself to be more forgiving rather than relying entirely on the user, that is a conversation worth having at the selection stage. For projects where reduced crystalline silica content is also a requirement, our non-silica quartz line is worth a look, and for heavy-use residential work a non-porous quartz slab gives you the low-maintenance body that makes cleaning easy and makes an accidental mark easier to live with while you decide what to do about it.
Apex Quartz Stone has manufactured engineered stone since 1997 from a 40,000 m² facility in Shuitou, Nan’an — nearly three decades of slab production, now more than 100,000 slabs a year for buyers in over 20 countries. We test our own surfaces rather than repeating marketing claims about them, and we will happily tell you which of our bodies suits a hot, heavy-use kitchen and which suits a vanity where the risk is staining rather than temperature. Send us your layout and your cooking habits, and we will recommend the body, the finish, and the edge profile that survives them. Start with the Calacatta quartz slab range for veined designs, or browse the full engineered quartz stone collection for everything else.
Alex Wang
Alex Wang has worked in engineered stone exports since 2014 and advises importers, fabricators, and developers on slab specification across more than 20 markets. Apex Quartz Stone (Quanzhou APEX Co., Ltd.) has manufactured engineered stone since 1997. Connect on LinkedIn.
Post time: Oct-08-2026