
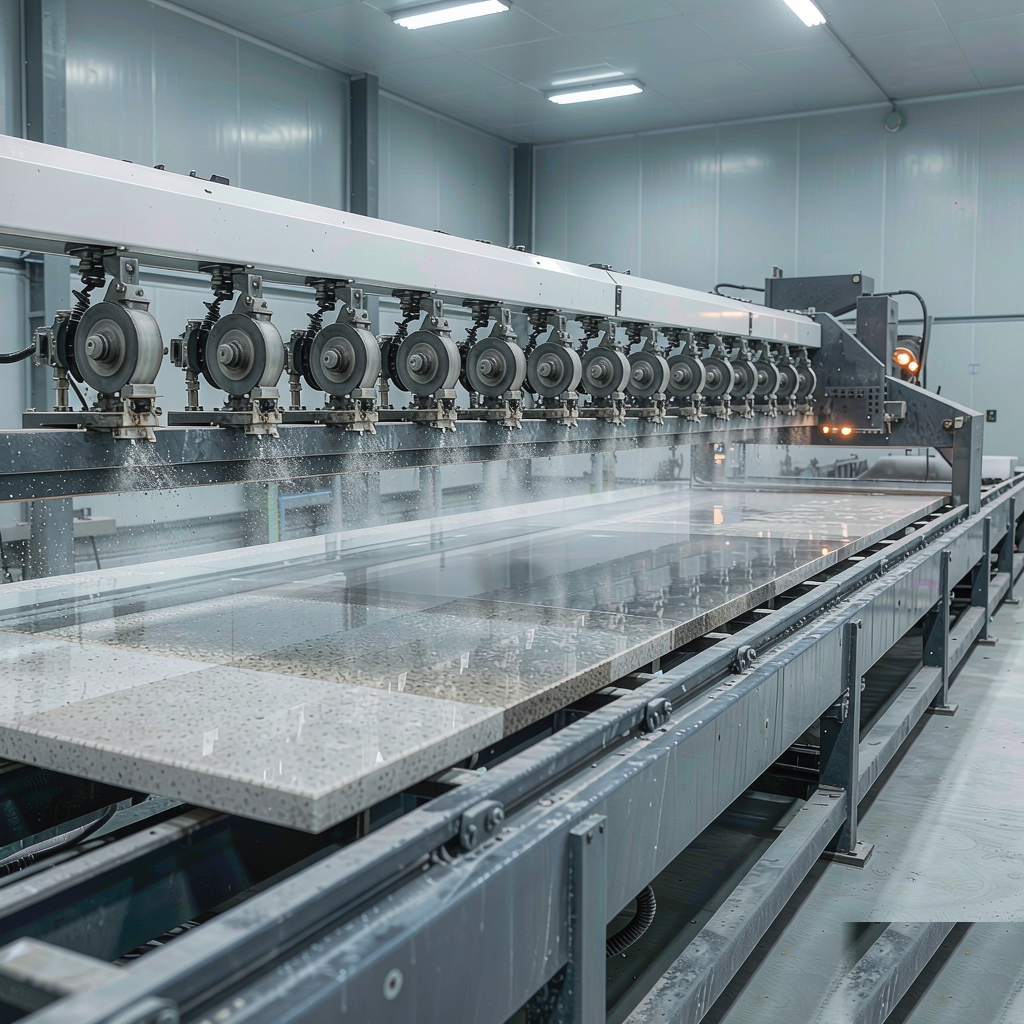
A crystal quartz countertop gets its mirror finish in two separate stages that buyers routinely confuse. The sparkle is created in the mixer, where translucent glass and crystal chips of roughly 0.5 to 6.0 mm are blended into the quartz aggregate and locked into the slab body at roughly 18 to 24 percent of aggregate mass. The mirror is created later, on a nine-head polishing line that walks the surface from about 50 grit up to 3000 grit and finishes with a buffing compound, lifting surface gloss from a matte state to 85 to 95 gloss units measured at 60 degrees per ASTM D523 methods. Everything between those two points — batching, vacuum vibro-compression at minus 0.095 MPa, curing at 80 to 100 °C, cooling, and diamond gauging — exists to make sure the polishing heads have something uniform to work on.
That distinction is the whole article, because it explains every quality complaint I have ever fielded about mirror-finish slabs. A slab with blotchy sparkle cannot be fixed at the polisher; the chips were unevenly distributed before the resin ever cured. A slab with a dull grey ghost patch cannot be fixed in the mixer; a head lingered and burned the resin. Because the sparkle and the mirror are produced at different stations by different physics, a defect tells you exactly which station failed — which is why the diagnostic section of this article is more useful to a buyer than any specification sheet.
I have walked this line several hundred times since we started exporting engineered stone, first as a natural-stone processor and now as a quartz manufacturer in Shuitou, and the mirror finish is still the process that separates disciplined factories from the rest. It is unforgiving. There is no pigment trick, no coating, and no after-sales polish that hides a body problem.
TL;DR
- The sparkle in a crystal quartz slab comes from translucent glass and crystal chips of about 0.5 to 6.0 mm blended into the body at roughly 18 to 24 percent of aggregate mass, so it is fixed at the mixing station and cannot be added by polishing.
- The mirror comes from a nine-head polishing progression running from approximately 50 grit to 3000 grit plus a buffing compound, which removes about 0.1 mm in total and lifts gloss to 85 to 95 gloss units at 60 degrees.
- Vacuum pinholes and resin polish burn are the two defects that ruin a mirror surface, and both are nearly invisible on a matte slab — which is why mirror bodies must be inspected under raking light, not overhead light.
- Glass chips polish faster than quartz grain because glass sits near Mohs 5.5 against quartz at Mohs 7, so the grit progression on a crystal body must be graded by the softer component or the chips end up sitting proud of the surface.
- Durability is unchanged by the finish — density near 2.4 g/cm³, water absorption under 0.05 percent per ASTM C97 methods — so the mirror cost is a visibility cost, not a structural one.
What “Mirror Finish” Actually Means in Engineered Stone
“Mirror finish” in engineered stone means a surface polished to 85 to 95 gloss units measured at a 60-degree angle, roughly double the 40 to 60 gloss units of a standard polished quartz slab and six to ten times the 5 to 15 gloss units of a honed or matte surface. Gloss is not a marketing adjective — it is a measured reflectance ratio, and the standard method for taking it is ASTM D523, which compares the specular reflectance of the specimen against a black glass standard at geometries of 60, 20, and 85 degrees. For quartz slabs, 60 degrees is the working angle because it discriminates well across the range a polished stone actually occupies.
Gloss and sparkle are separate properties and behave independently. Gloss is a surface property that the polishing line controls, while sparkle is a body property that the mixer control, and no adjustment at either station can substitute for the other. A honed crystal body still shows its chips when you tilt it toward a window; a mirror-polished plain white slab has no sparkle at all, just a hard reflective calm. When a client asks us for “the shiniest option,” these two requests get separated in the same conversation, because one is a polishing question and the other is a formulation question.
The commercial reason the number matters is perception. Below about 60 gloss units, a white surface reads as bright. Above about 80 gloss units, it stops behaving like a bright surface and starts behaving like an optical one — it reflects the room, the window, the pendant lights, and the person standing behind the island. Because a mirror finish turns a horizontal surface into a reflective plane, it changes how large a kitchen feels rather than simply how clean it looks, and that is the effect designers are actually buying.
The Sparkle Is Decided Before the Slab Exists
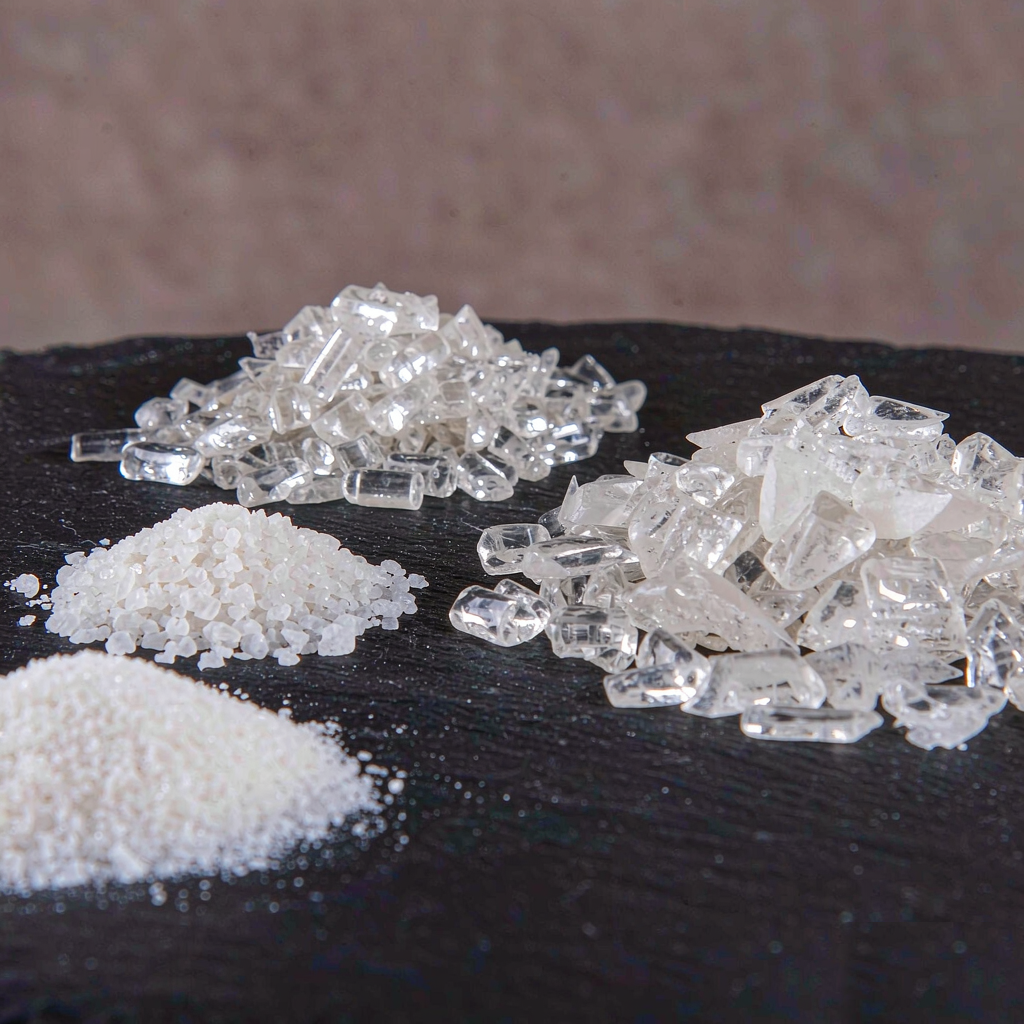
Crystal quartz is engineered stone whose aggregate blend includes a defined fraction of translucent glass or crystal chip alongside the standard quartz sand, and the sparkle is the light that enters those chips, reflects off their internal surfaces, and exits at a new angle. Quartz sand is opaque and scatters light at its surface. A glass chip is transparent, so a ray can pass inside, strike the far facet, and come back — which is why the effect reads as depth rather than as glitter.
The chip fraction and, more importantly, its size band decide what the finished surface looks like from a standing height. In our own batch records for a 12 mm crystal body, aggregate accounts for roughly 92 percent of slab mass, with glass chip making up 18 to 24 percent of that aggregate and the rest a graded quartz sand from about 0.1 mm to 1.2 mm. Chip size drives character:
- A chip band of 0.5 to 1.2 mm produces a fine, even shimmer that reads as a uniform brightness gain and photographs almost like a plain white surface.
- A band of 1.0 to 3.0 mm produces the classic crystal look, with individual points of light that resolve at normal viewing distance.
- A band of 3.0 to 6.0 mm produces large flakes that read as a design feature and demand layout planning, because the eye can follow individual chips across a seam.
Resin content sits between 7 and 10 percent by mass, and it is the most underestimated variable in the entire recipe. The resin is not filler — it is the matrix that holds every chip in place and transmits light into it. Under-resin a crystal body and the chips starve for optical coupling and the slab loses depth; over-resin it and the surface takes on a plastic sheen that no polishing sequence can remove.
Mixing discipline is where most sparkle problems are born. Blending 92 percent solids with 8 percent resin and pigment in a planetary mixer takes 8 to 12 minutes, and the resin dosing has to hold within roughly plus or minus 0.3 percent by mass. Because a crystal body shows its mixing history on the finished face, the inspection mirrors do not catch the fault — they magnify it, and the light tunnel will show uneven chip density as blotches that follow the mixer’s fill pattern.
Station by Station: The Seven Steps From Dry Mix to Mirror
A crystal mirror slab passes through seven production stations, and every one of them can independently destroy the finish that a later station is supposed to produce. The table below is the sequence as it runs on our line, with the parameter that matters and the failure it produces when that parameter drifts. In the paragraphs after it, I will explain the three stations that buyers most often misunderstand.
| Station | What happens | Key parameter | What goes wrong |
|---|---|---|---|
| 1. Batching & mixing | Graded quartz sand, glass chip, resin, and pigment blended in a planetary mixer | 8–12 min; resin dose ±0.3% by mass | Unmixed clumps read as blotchy, uneven sparkle |
| 2. Distribution & vibro-compression | Mix laid into a 3200 × 1600 mm mould and pressed under vacuum with vibration | Vacuum near −0.095 MPa; ~25 bar; 2–3 min | Lost vacuum traps air; pinholes survive the press |
| 3. Curing | Slab passes through a tunnel oven to set the resin matrix | 80–100 °C for 30–45 min | Under-cure leaves a soft surface that orange-peels at the polisher |
| 4. Cooling & staking | Slabs stand to reach ambient temperature before dimensioning | Below ~40 °C before gauging | Gauging a hot slab causes thickness drift after it cools |
| 5. Calibration (gauging) | Diamond head calibrates the slab to nominal thickness | 12, 20, or 30 mm, ±0.5 mm | Uneven gauge becomes a visible wave in the polished face |
| 6. Polishing | Nine heads carry progressively finer abrasive, then a buffing compound | ~50 → 3000 grit; 8–15 µm removed per head | Resin burn if a head lingers; milky haze if the progression is rushed |
| 7. Inspection & filming | Raking-light tunnel scan, glossmeter check, protective film applied | 85–95 GU at 60°; ±3 GU across the slab | Missed pinholes reach the customer and show as dark specks |
Vacuum vibro-compression is the station that decides whether the mirror is clean
The press does two jobs at once, and the vacuum is the one people forget. Filling a 3200 × 1600 mm mould with a 92-percent-solids mix inevitably traps air between chips, and if that air is not evacuated before the resin sets, each bubble becomes a void with a diameter of a few tenths of a millimetre. On a matte surface these are effectively invisible. On a 90-gloss mirror they collect in the light and appear as dark specks, and a customer who has paid a premium for a mirror finish notices every one. Holding vacuum near minus 0.095 MPa through a 2 to 3 minute press cycle at around 25 bar is what removes them.
Curing temperature is a finish problem disguised as a chemistry problem
Under-cured resin does not look under-cured when it leaves the oven — it looks slightly soft, and soft is exactly what an abrasive head exploits. A slab that reaches the polisher below full cure will abrade unevenly, produce a rippled “orange peel” surface, and never take the full gloss the line is set for. The 80 to 100 °C window and 30 to 45 minute dwell are the parameters that matter, and every plant that chases throughput by shortening the oven is trading visible surface quality for invisible production numbers.
Gauging first, polishing second — never the reverse
Calibration to 12, 20, or 30 mm at plus or minus 0.5 mm has to happen on a cool slab and before polishing, because the polishing heads remove material at a fixed rate, not a fixed depth. Calibrate with a wave in the thickness and the polish will faithfully reproduce that wave as a soft band across the face. Because the polishing line cannot flatten geometry — it can only refine a surface — every flattening job belongs upstream, and that is why a mirror slab with wavy reflections is a calibration defect rather than a polishing defect.
Why Polishing Is Really “Controlled Scratching”
Polishing works by replacing large scratches with progressively smaller ones until the scratches fall below the size that interacts with visible light, and then by softening the last remnants with a chemical buffing step. There is no burnishing and no coating. Each of the nine heads on our mirror line carries a different abrasive grade, beginning around 50 grit and stepping through roughly 100, 200, 400, 800, 1500, and 3000 grit before a buffing compound finishes the sequence. Each head removes about 8 to 15 micrometres of material, so the whole progression takes off roughly 0.1 mm.
Rushing the progression does not work, and this is the single most common shortcut I see in the industry. Jump from 200 grit to 800 grit and the finer head polishes the plateaus between the deeper grooves but cannot reach the groove floors; the result is a surface that measures reasonably bright but shows a fine directional haze when you view it against a window at a low angle. It passes a casual inspection and fails a raking-light one.
Crystal bodies add a complication that plain quartz bodies do not have. Glass chip sits near Mohs 5.5, while quartz grain sits at Mohs 7, so the two components abrade at different rates under the same head. Because the softer chip wears away faster than the surrounding quartz grain, a grit progression tuned purely for quartz will leave the crystal chips recessed or standing proud, and the sparkle will read as a chain of shallow dimples instead of points of light. Getting this right means grading the progression by the softer component and accepting a slightly slower line — which is exactly the kind of trade a factory makes quietly and a buyer never sees on a quotation.
One more thing hides inside the polishing station: heat. Friction at a polishing head generates real temperature, and that temperature lands on resin, not on quartz. A head that lingers too long in one place — usually because of a hesitation in the conveyor or a manual touch-up — will soften the resin enough to burn it, leaving the grey haze I will describe in the next section.
The station also carries the health obligations of the whole plant. Polishing is a wet process, and it is wet for two reasons: water cools the head and, more importantly, water suppresses the respirable crystalline silica dust that would otherwise fill the shop. OSHA’s crystalline silica standards describe cutting, grinding, and polishing of engineered stone as activities that generate respirable silica, and they apply to every factory in this industry whether or not it exports to the United States. Because a mirror line runs more abrasive passes than a standard line, it also generates more dust, so the finishing department is the last place a serious manufacturer would cut corners on water supply or extraction.
The Two Defects That Ruin a Mirror Finish
Vacuum pinholes and resin polish burn are the two failure modes specific to mirror-finish surfaces, and both are more visible on a mirror than on any other finish because gloss amplifies every optical discontinuity. Everything else — scratches, chips, staining — behaves the same way on a mirror as on a standard polished slab. These two are the ones that justify the raking-light inspection.
| Symptom you see | Root cause | Station responsible | Repairable? |
|---|---|---|---|
| Tiny dark specks scattered across the face | Air voids that survived the press | 2 — distribution & vibro-compression | No; voids are inside the body |
| Dull grey ghost patch with soft edges | Resin overheated by a head that lingered | 6 — polishing | Rarely; re-polishing usually enlarges it |
| Fine directional haze visible against a window | Grit step skipped in the progression | 6 — polishing | Yes, by repeating the correct sequence |
| Soft waves in reflected light across the slab | Thickness variation carried through from gauging | 5 — calibration | No; geometry cannot be polished flat |
| Blotchy, uneven sparkle density | Incomplete mixing or uneven chip distribution | 1 — batching & mixing | No; chip placement is fixed |
| Chains of shallow dimples around crystal chips | Grit progression tuned for quartz, not for the softer chip | 6 — polishing | Partly, by re-polishing to a graded sequence |
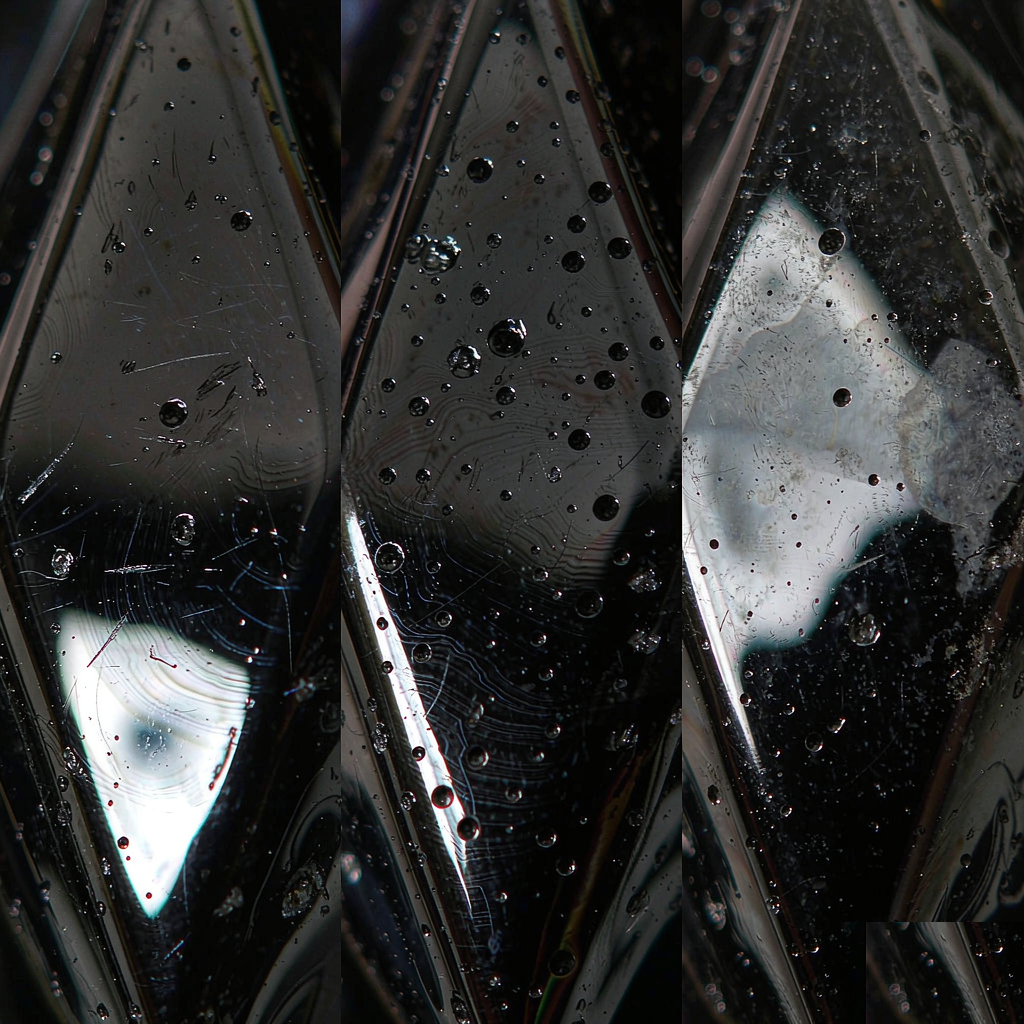
Two entries in that table deserve emphasis because buyers get told the opposite. The first is that polish burn is not a stain and not a film. It is a change in the resin itself, and no cleaner will touch it. The second is that pinholes are not contamination. When a customer sends me a photograph of “black dots” on a mirror slab and asks which cleaner to use, the honest answer is that no cleaner is involved — the defects are voids, and the only remedy is a credit and a replacement from a slab that held its vacuum.
How to Inspect Crystal Mirror Quartz Before You Buy
A mirror-finish slab should be accepted on measured evidence rather than on a showroom reflection: a 60-degree glossmeter reading, a raking-light scan, and a test certificate covering absorption and flexural strength. In practice, few importers have a glossmeter on the factory floor, so the checklist below is ordered from the tests anyone can run to the ones worth requesting from the factory.
- Ask for a glossmeter reading at 60 degrees, taken at five points across the slab, and require consistency within plus or minus 3 gloss units. A slab that reads 92 in the centre and 78 in a corner has a polishing line problem, not a lighting problem.
- Scan the face with a single raking light at 10 to 15 degrees. This is the only inspection that reliably exposes pinholes, waves, and polishing haze on a mirror surface.
- Request water absorption and bulk specific gravity to ASTM C97 methods — under 0.05 percent absorption and density near 2.4 g/cm³. These confirm the slab is a true engineered quartz body rather than a resin-rich casting with a shiny top.
- Request flexural strength to ASTM C880 methods. A well-compacted crystal body should carry its load as a stone, not as a plastic.
- Check the back face. A uniform, evenly coloured back with no dry patches or bare aggregate is a fast indicator that the press cycle was sound.
- Confirm the whole project ships from one production batch. Crystal bodies are mixed, not printed, so a second batch will differ in sparkle density even when the recipe is identical.
How to tell real crystal chip from resin glitter
The cheapest way to fake a crystal look is to suspend glitter in the resin rather than blend real glass chip into the aggregate. The two are easy to separate once you know what to look for. Under a loupe, true crystal chips show angular, irregular facets sitting at different depths beneath the polished plane, and each one holds a distinct highlight. Resin glitter reads as flat metallic flakes all sitting on one shallow plane, and it scatters light in a single uniform colour rather than showing internal refraction. Ask a fabricator to cut a small offcut through the face: a real crystal body shows chips continuing into the exposed cross-section, while glitter stops at the surface layer.
Where a Mirror Finish Earns Its Premium
A mirror finish is worth its cost on surfaces that are meant to be looked at — dark bases, bar fronts, bathroom vanities, and the island in an open-plan kitchen — and it is a liability on large, heavily used workhorse surfaces where fingerprints and water spots will be on display constantly. Crystal bodies typically sit 5 to 15 percent above the equivalent plain white in the same thickness because of the chip cost and the slower polishing line, and that premium is recovered visually or not at all.
The finishes that benefit most are the dark ones. A black or deep grey crystal mirror reflects the room with real depth, and the chips read as stars against a dark field — a genuinely different effect from the same body polished to 40 gloss units. The finishes that suffer most are the light, high-traffic ones in busy family kitchens, where every fingerprint on a 90-gloss surface is visible from across the room. In those applications I usually steer the conversation toward a honed or satin finish on the same body, or toward a super white quartz in a standard polish, which reads almost as bright with none of the maintenance theatre.
Where the finish consistently wins its premium, in my own order book, is the black-and-gold fashion of the last three years: a black bean body with a heavy crystal chip load and a mirror finish, specified for reception desks and bar fronts. It is a dramatic surface, it photographs extremely well, and the client is buying exactly what the process produces. If you want to see how that reads in practice, the range sits under our crystal mirror quartz slab collection, and the polishing specification is identical across every colour in the line.
Frequently Asked Questions
See the Finish on a Real Slab, Not in a Photograph
The mirror finish is the one quartz property that cannot be judged from a catalogue image, because every photograph of a reflective surface is really a photograph of whatever was behind the camera. If you are specifying crystal mirror for a project, the productive next step is a physical sample under a raking light, plus a glossmeter reading and a test certificate for the batch you will actually receive.
Apex Quartz Stone has manufactured engineered stone since 1997 from a 40,000 m² facility in Shuitou, Nan’an — nearly three decades of slab production, now more than 100,000 slabs a year for buyers in over 20 countries. We run both standard and mirror polishing lines on the same bodies, so the sparkling effect and the gloss level can be quoted independently and verified separately. Send us your drawing and the look you are targeting: we will tell you which crystal chip band reproduces it, what gloss level the surface will carry, and which of our bodies matches your design intent. Start with the polished quartz kitchen countertop range for standard finishes, or step up to Calacatta white quartz countertops where a mirror polish is specified on a veined body.
Alex Wang
Alex Wang has worked in engineered stone exports since 2014 and advises importers, fabricators, and developers on slab specification across more than 20 markets. Apex Quartz Stone (Quanzhou APEX Co., Ltd.) has manufactured engineered stone since 1997. Connect on LinkedIn.
Post time: Oct-10-2026