
Vacuum compression and curing are the two stages that turn a loose quartz-resin mix into a slab you can warranty. During vacuum compression, the batched mix is dosed into a rubber-lined mold, the press chamber is evacuated to roughly -0.098 MPa — about 98% of the air removed — and the slab is formed under several thousand tonnes of force while vibration settles the aggregate into a dense, interlocking packing. Because the air is withdrawn before full compaction, the resin can flow into the voids between grains instead of sealing bubbles inside the slab. Curing then finishes the job: the pressed blank is held in ovens at 80–100 °C on a controlled schedule, the resin polymerizes, and the slab gains the flexural strength and dimensional stability fabricators depend on. Shorten either stage and the consequences are measurable — pinholes and porosity come from poor vacuum, while warping and micro-cracking come from an uncontrolled cure.
At Apex Quartz Stone, these two stages run around the clock in our 40,000 m² plant in Shuitou, Fujian, where we have manufactured engineered quartz stone since 1997 and ship more than 100,000 slabs a year to buyers in over 20 countries. This article walks through both stages the way a process engineer sees them: what each machine actually does, which numbers matter, and what goes wrong when they drift.
TL;DR
- Vacuum is drawn before full press force so air leaves the mix rather than being trapped; production presses typically reach about -0.098 MPa, roughly 98% vacuum.
- Vibration plus several thousand tonnes of press force packs a mix of roughly 90–93% mineral and 7–10% resin into a dense, interlocked structure in a cycle of about 8–15 minutes per mold.
- Curing at 80–100 °C polymerizes the resin, and it is the oven schedule — not calendar time — that decides final flexural strength and flatness.
- Poor vacuum shows up as pinholes and water absorption above 0.05% by weight; a poor cure shows up as warping and edge chipping during fabrication.
- Both stages are verifiable before you pay: batch data per ASTM C97 (absorption) and ASTM C880 (flexural strength) exposes any shortcut.
Why Air Is the Enemy Inside a Quartz Slab
Engineered quartz is, by weight, typically 90–93% crushed quartz mineral and 7–10% resin with pigment. Quartz itself is a remarkably hard mineral — 7 on the Mohs scale, which is why it survives decades of kitchen wear — and Britannica describes it as one of the most abundant and economically important minerals in the Earth’s crust. But hardness alone does not make a countertop. The mineral grains carry no cohesion of their own; every structural property of the finished slab comes from the resin film coating each grain and locking them together.
That is where air becomes the problem. Mixing, dosing and spreading the aggregate inevitably folds air into the batch. If that mix were simply compressed, the story would end badly for two reasons. First, air bubbles contract under load and re-expand when the load releases, so a slab pressed without vacuum is left with voids distributed through its entire thickness. Second, trapped air blocks resin from wetting the grain surfaces around it, so the bond in that zone never forms properly even if the void itself is small.
The consequences surface predictably. A void that sits just under the polished face is opened by the polishing heads and appears as a pinhole — the classic defect buyers spot under raking light. A cluster of micro-voids raises the slab’s porosity, which is why some cheap quartz stains even though resin-bonded stone should be essentially non-porous. The relationship is direct: more entrapped air means more porosity, and more porosity means more staining pathways and lower flexural strength. This is also why a well-made non-porous quartz slab is a pressing achievement, not a formulation achievement — the recipe matters, but the vacuum decides the voids.
Inside the Vacuum Press: Vacuum, Vibration, Pressure, Time
A quartz press line forms slabs one mold at a time, and the sequence matters more than any single setting. The mold — a rubber blank set in a rigid frame — receives a weighed charge of mix, which is spread and leveled to a loose bed. The press platens close over the mold, the chamber seals, and the vacuum system begins to draw. Only after the chamber approaches its target vacuum does the line apply vibration and full compaction force together, holding that state for the remainder of the cycle.
The order of those events is the whole trick. Because the air is pulled out while the bed is still loose and deformable, bubbles have an escape path; once several thousand tonnes of force have closed the bed, that path no longer exists. Vibration then does a second job: it shakes the aggregate grains so they rotate and re-pack into their densest arrangement, letting resin flood into the remaining gaps. The result is a slab whose density is uniform from face to face and edge to edge.
Typical operating windows look like this (exact values vary by press design, recipe and thickness — treat these as industry-typical ranges, not a single factory’s spec):
| Parameter | Typical range | Why it matters |
|---|---|---|
| Chamber vacuum | -0.09 to -0.098 MPa (≈90–98% vacuum) | Deeper vacuum removes more entrapped air before compaction seals the bed. |
| Vacuum draw + hold | 3–6 minutes | Gives air in deep layers time to migrate out of the bed. |
| Press force | 4,000–8,800 tonnes (line-dependent) | Compacts the settled bed to target thickness and density. |
| Vibration frequency | ≈25–35 Hz | Rotates and re-packs aggregate grains so resin fills residual voids. |
| Total forming cycle | ≈8–15 minutes per mold | Sets line throughput; shortening it is the most common quality shortcut. |
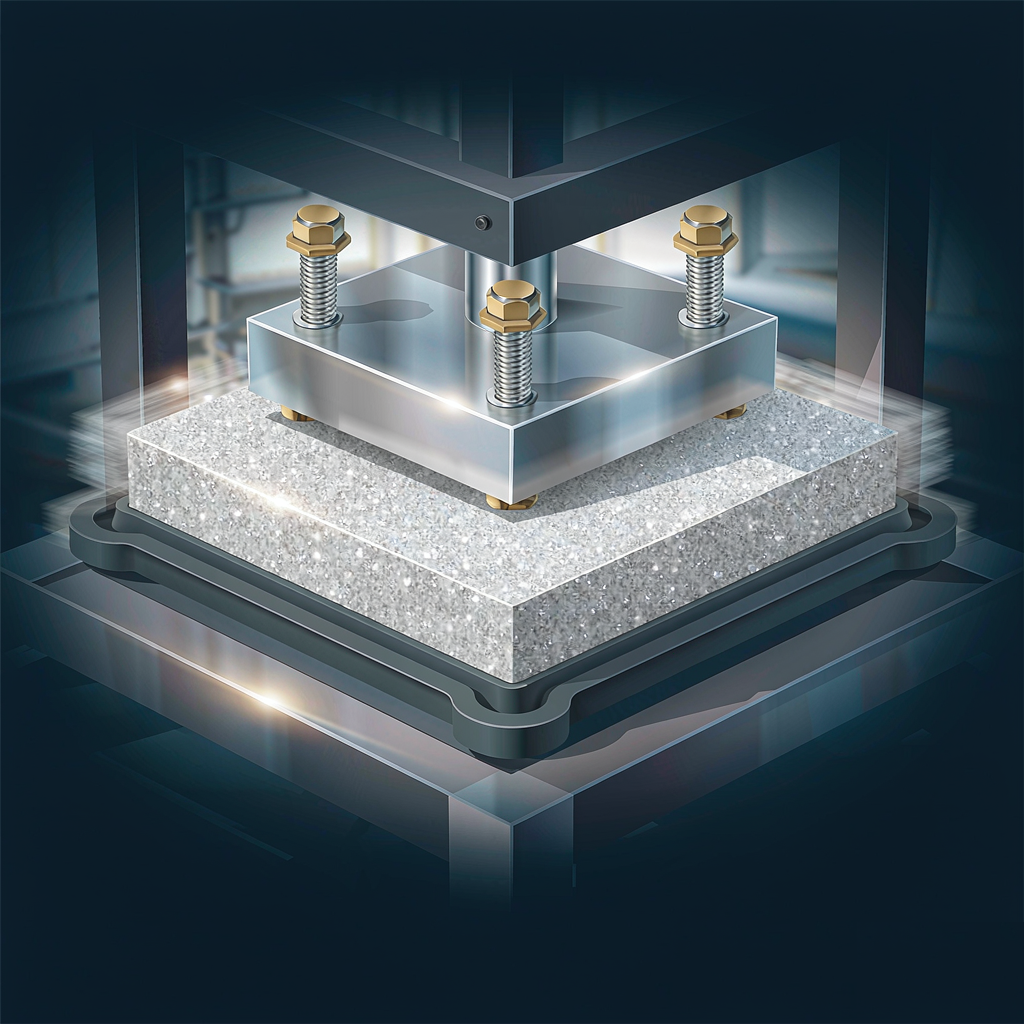
Two details from the factory floor are worth knowing as a buyer. The rubber mold is what makes vacuum sealing possible — it deforms against the platens to close the chamber, which is why mold condition is a routine maintenance item and a worn mold often shows up first as edge porosity. And cycle time is where pressure to raise output lands first: when a line is pushed beyond its design cadence, the vacuum hold is usually the first phase to be trimmed, because the defect it creates is invisible on a green slab and only appears after polishing. A supplier that documents its cycle parameters is telling you something real about its process discipline; one that cannot is telling you something too.
Curing: The Chemistry That Locks the Slab Together
A slab leaving the press is dense but green — the resin has only partially cross-linked, and the slab still handles like a firm compact rather than a finished stone. Curing completes polymerization, and it is a temperature-and-time process, not simply “drying”. The pressed slab is transferred to curing ovens and held at 80–100 °C for a controlled schedule, typically starting with an oven phase measured in tens of minutes, followed by slower holding and controlled cooling measured in hours.
The chemistry explains the schedule. Polyester-based resin systems polymerize exothermically — curing generates heat from within the slab, not just from the oven — and the reaction accelerates as temperature rises. That creates a balancing act: too cold and the resin never reaches full conversion, leaving a weak matrix; too hot, too fast, and the exotherm peaks above the resin’s tolerance, causing embrittlement and micro-cracking around the quartz grains. Because polymerization also shrinks the resin slightly, any temperature difference between slab surface and core turns into a shrinkage difference — which is a direct mechanical recipe for warp. This is why the cooling phase is engineered, not incidental.
A typical cure schedule is structured in phases, roughly as follows:
| Phase | Typical conditions | Purpose |
|---|---|---|
| Oven cure | 80–100 °C, roughly 30–60 minutes | Drive resin conversion through its main reaction window. |
| Holding / secondary cure | Graduated temperature, several hours | Equalize cure through the slab thickness and complete conversion. |
| Controlled cooling | Slow ramp-down to ambient | Prevent surface-to-core thermal gradients that cause warping. |
| Post-cure rest | Ambient, before gauging & polishing | Let residual stresses relax before final dimensioning. |
For buyers, the practical takeaway is that a slab is only as flat as its cooling curve. Banana-shaped slabs, edge curl and thickness variation across a sheet are rarely pressing failures — they are cure and cooling failures, and they usually trace back to a line pushing throughput past its thermal capacity. Dimensional stability is also what makes a polished quartz kitchen countertop feasible: fabricators CNC-cut sink holes and edge profiles assuming the sheet behaves predictably, and an under-cured sheet chips and cracks precisely where those operations concentrate stress.
What Goes Wrong When Either Stage Is Cut Short
The most useful way to understand these two stages is to see what their failures look like downstream. Each defect below has a specific mechanical origin, which means each one points back to a specific stage:
| Defect | Stage responsible | Mechanism | When the buyer sees it |
|---|---|---|---|
| Pinholes on polished face | Vacuum insufficient or cut short | Subsurface bubbles opened by polishing heads | Raking light at inspection; worse after installation lighting |
| Resin-rich / resin-dry patches | Vibration phase shortened | Aggregate not re-packed; resin migrates unevenly | Color patchiness or gloss variation across the sheet |
| Warping (banana slab) | Cooling after cure too fast | Surface-to-core shrinkage difference sets in permanent stress | Slab will not lie flat on cabinets; shimming reveals it |
| Low flexural strength | Under-cure or low press force | Resin matrix not fully polymerized or under-compacted | Cracking at cutouts and narrow spans during fabrication |
| Edge chipping during cutting | Under-cured resin | Brittle grain-resin interface instead of tough bond | Fabricator’s waste rate climbs on the same SKU |
| Hairline micro-cracks | Exotherm overshoot in cure | Reaction heat exceeds resin tolerance, cracking bonds locally | Fine crazing visible after months of thermal cycling |
Notice the causal logic in that table: pressing failures live in the surface and porosity, while curing failures live in shape, strength and toughness. That split is diagnostic gold when you get a problem batch. Pinholes never come from the oven, and warp never comes from the vacuum pump — so a supplier’s response to a defect claim tells you whether they actually understand their own line. It also explains why the same two stages keep appearing in every serious factory audit: they concentrate more finished-slab quality than any other point in production, including polishing. Buyers evaluating engineered quartz stone suppliers are well advised to ask specifically about press vacuum levels and cure oven logs, not just polishing grit progressions.
The Numbers That Tell You a Slab Was Pressed and Cured Properly
Process discipline is invisible; test data is not. Four measurements capture nearly everything the press and cure stages contribute to a slab’s quality:
- Water absorption below 0.05% by weight. Measured by the methods in ASTM C97, absorption is the single best proxy for void content. Well-pressed, well-cured engineered quartz sits well under 0.05%; porous batches climb above it.
- Flexural strength in the commonly published 30–45 MPa range. Tested per ASTM C880, flexural strength is where cure quality shows up numerically — under-cured matrices simply cannot reach it.
- Density around 2.35–2.45 g/cm³. Consistent density across batches means the press is hitting the same compaction every cycle; drift means it is not.
- Flatness within about 0.5 mm over a 3.2 m span, and thickness within ±0.5 mm. Both are cooling-curve outcomes, verifiable with a straightedge and calipers at unloading.
Ask for these values on a batch basis, not a brochure basis. A factory running a disciplined vacuum and cure cycle generates this data continuously because it needs it internally; one that has never seen its own C97 numbers is telling you exactly how much it knows about its press. At Apex, this is also how we keep specialty lines consistent — the sparkle of a crystal mirror quartz slab or the clean face of super white quartz only stays clean when pressing and curing parameters hold from batch to batch.
The Same Process, Seen Through Worker Safety
The press and cure stages also sit at the start of a safety chain that runs through the whole factory. Engineered stone’s crystalline silica content becomes hazardous when it is airborne — dry cutting, grinding and polishing generate respirable silica dust, and OSHA estimates about 2.3 million workers in the United States alone are exposed to silica at work, with countertop fabrication specifically flagged in its hazard alerts. Forming and curing slabs is the clean part of the chain; the exposure risk concentrates in downstream shaping, which is exactly why disciplined factories run enclosed, wet processes with extraction wherever stone is cut.
This matters to buyers for two reasons. First, a factory that invests in dust control is usually the same factory that invests in vacuum pumps and cure ovens — safety discipline and process discipline come from the same management culture. Second, your own market may increasingly regulate the fabrication stage, so understanding where silica exposure arises (and that a properly wet-fabricated quartz product handles it) lets you answer end-customer questions with facts rather than fear.
Frequently Asked Questions
Ask for the Parameters, Not Just the Pictures
Anyone can photograph a clean factory. Far fewer suppliers can hand you a press vacuum log, a cure oven schedule, and batch C97/C880 data that line up with the slabs on the container. The difference between a good quartz slab and a cheap one is almost entirely decided inside the vacuum press and the curing oven — two stages the end customer will never see, on defects they will definitely notice.
If you are specifying engineered quartz for a project or a distribution program, ask your supplier three questions: what vacuum level does your press hold, what does your cure-and-cool schedule look like, and can you show absorption and flexural data for the exact batch you will ship me. We answer those questions every week at Apex Quartz Stone — it is the standard our export team, led from the sales side by Alex Wang, has worked to since we began manufacturing in Shuitou in 1997. Send us your project specs and we will respond with parameters, test data and a loading plan you can put in front of your fabricator.
Alex Wang
Alex Wang leads international business development at Quanzhou APEX Co., Ltd. (Apex Quartz Stone), an engineered quartz manufacturer founded in 1997 in Shuitou Town, Nan’an, Quanzhou, Fujian, China. The company operates a 40,000 m² production facility with an annual output of more than 100,000 quartz slabs, exporting to over 20 countries.
Post time: Oct-13-2026